TWO-FACTOR AUTHENTICATION
We implemented two-factor authentication to serve as an extra layer of security. It is an authentication mechanism that double checks if your identity is legitimate.
Traditionally, when you want to sign in to your account, you are prompted to authenticate with a username and a password. Two-factor authentication will work as an extra step in the authentication process that helps us confirm your identity and ensure the maximum security level for your account.
If you wish your account to be more secure, we strongly encourage you to activate the Two-Factor Authentication feature as soon as possible.
ENABLING TWO-FACTOR AUTHENTICATION
Step 1:
Click on your Profile on the top-right menu. Then find the Two-Factor Authentication switch in the "Change Password" section. Toggle the switch to ON.

The two-factor authentication toggle switch for your ZeroBounce account
Step 2:
In order to activate Two-Factor Authentication, you need to install Authy (IOS/Android) or Google Authenticator (IOS/Android) on your phone. After you install one of these and configure it, you are ready to move on to the next step.
Step 3:
Great! Now use Authy or Google Authenticator to scan the QR Code or just manually type the provided code in the field as shown below.
REMEMBER: For security purposes, the code is refreshed every 30 seconds.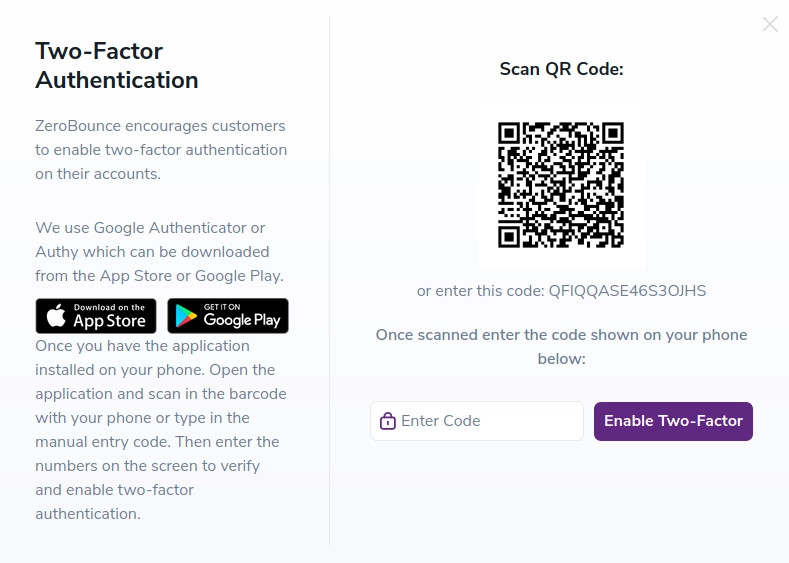
QR code window for enabling Two Factor Authentication on your ZeroBounce account
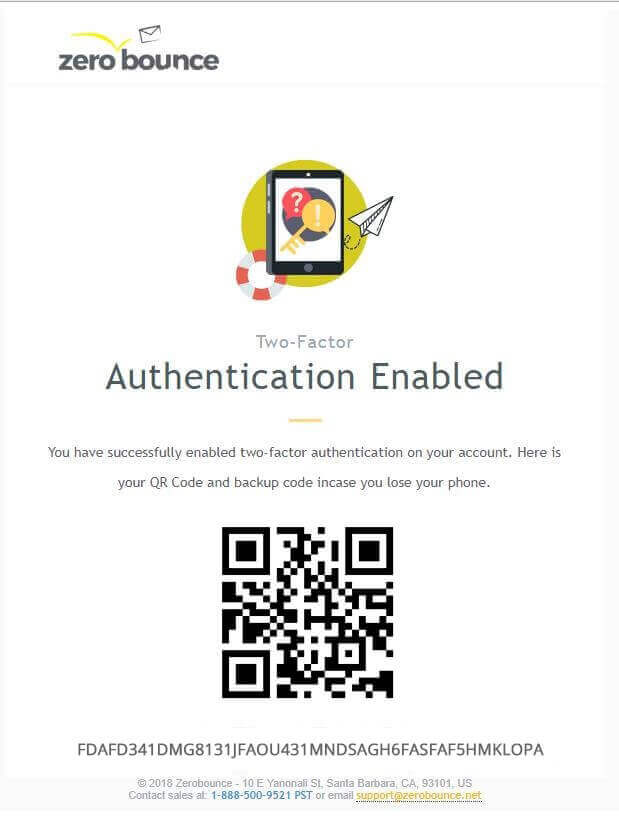
Step 4:
Congratulations! You now have an extra layer of security activated on your account.
Step 5:
When you sign in next time, after you enter your username and password, you will be prompted to provide the six-digit code from your authenticator app in order to authenticate successfully.
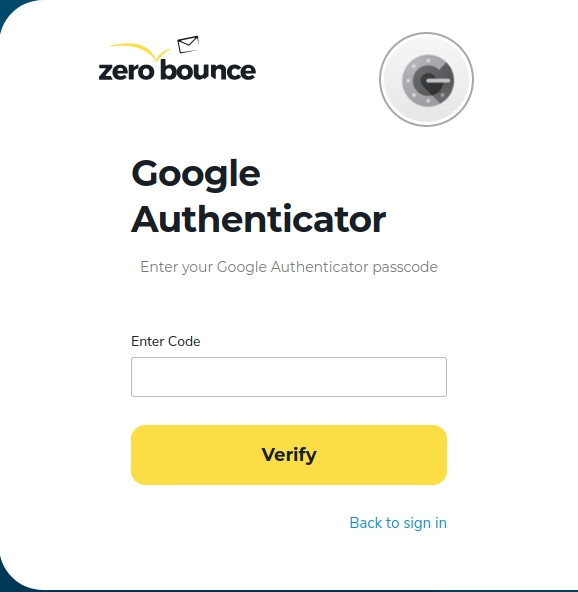
Field for inserting your Google Authenticator passcode for your ZeroBounce account
RESET YOUR PHONE FOR TWO-FACTOR AUTHENTICATION
If you no longer have access to the devices where you installed the authenticator app, don't worry, your account is still secure!
Reset instructions for Authy: In order to reset your phone at Authy, just follow these instructions.
Reset instructions for Google Authenticator:
When you first setup Two-Factor Authentication, you received a backup code. You will need that code in order to reset your phone for Google Authenticator.
You will be emailed a google Autentificator QR Code
- Install Google Authenticator
- Choose 'Manual Entry'
- Enter your email that you use to sign in on ZeroBounce account.
- Enter your backup code.
- Congratulations! You now have successfully resync your new phone with ZeroBounce Two-Factor authentication.
DISABLE TWO-FACTOR AUTHENTICATION
In order to disable Two-Factor Authentication, click on your account Profile on the top-right menu, go to the "Change Password" section, and toggle the Two-Factor Authentication switch to OFF.