ZeroBounce email validation allows you to identify valid, invalid, and high-risk emails rapidly. The new integration with Cloudflare Worker allows you to validate emails on any of your websites in real time with zero overhead or slowdown. The seamless integration allows for zero impact on the user experience.
To start the Cloudflare Worker integration, you only need to copy and paste the worker script to your site. You do not need to clone any Git projects, install Wrangler, or any additional tools.Copy the worker script from here
However, there are several prerequisites that you must configure before applying the worker script.
Follow these steps to use the integration:
Step 1 - Create storage for your email validation logs
- From your Cloudflare account, go to the left-side menu and click Workers KV.
- Click Create namespace.
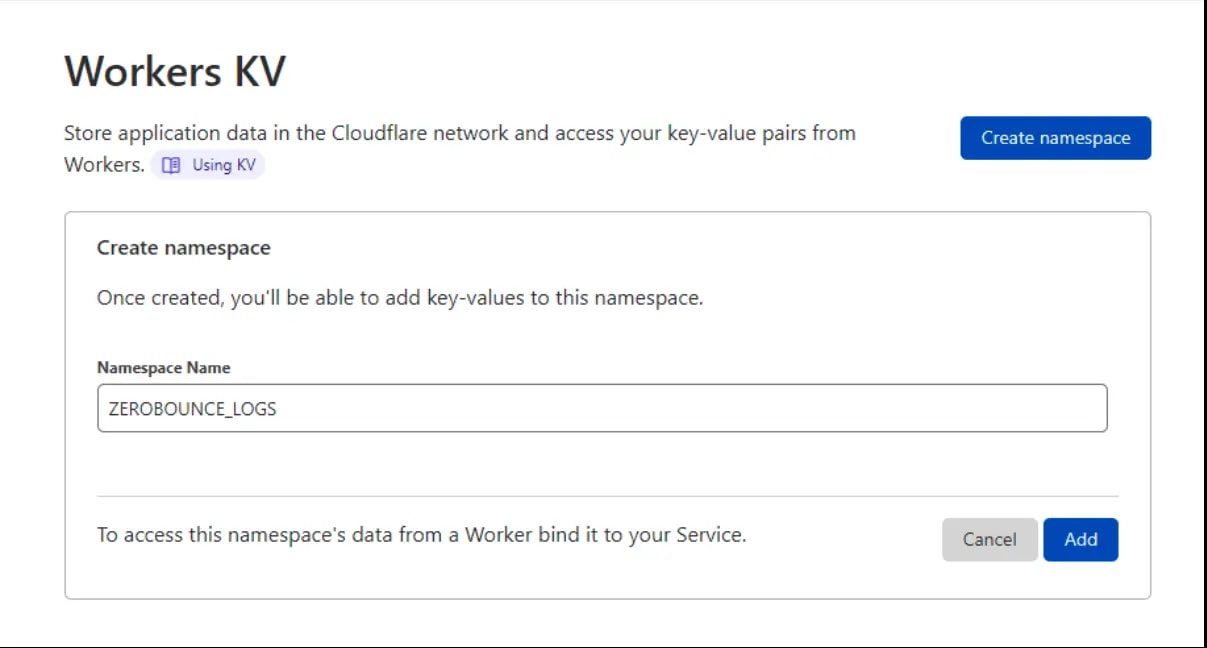 Screenshot of the Cloudflare Workers KV Namespace to store email validation logs
 - Enter a name for your logs in the “Namespace Name” field. We recommend using the name ZEROBOUNCE_LOGS.
- Click Add.
Step 2 - Create the worker
- From the left-side menu, click on Workers.
- In the Create a Service menu, enter a name in the “Service name” field. You can name this anything you want or use the default name provided by Cloudflare.
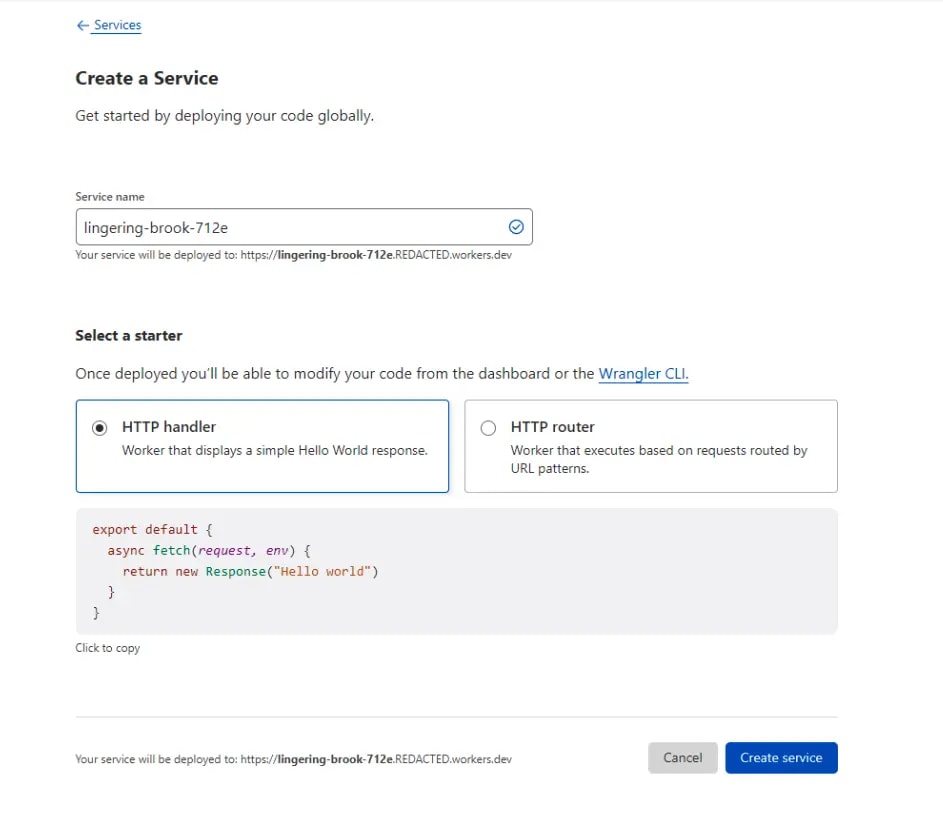 A screenshot of the Cloudflare Workers menu where you can create a service for the ZeroBounce Cloudflare Worker integration
 - From the options, select HTTP handler.
- Click Create service.
Step 3 - Setting variables
After creating the service, you will automatically redirect to the service overview.
From here
- Click on the Settings tab.
- Click on Variables.
- Click Add variable. Create the following variable names and values,
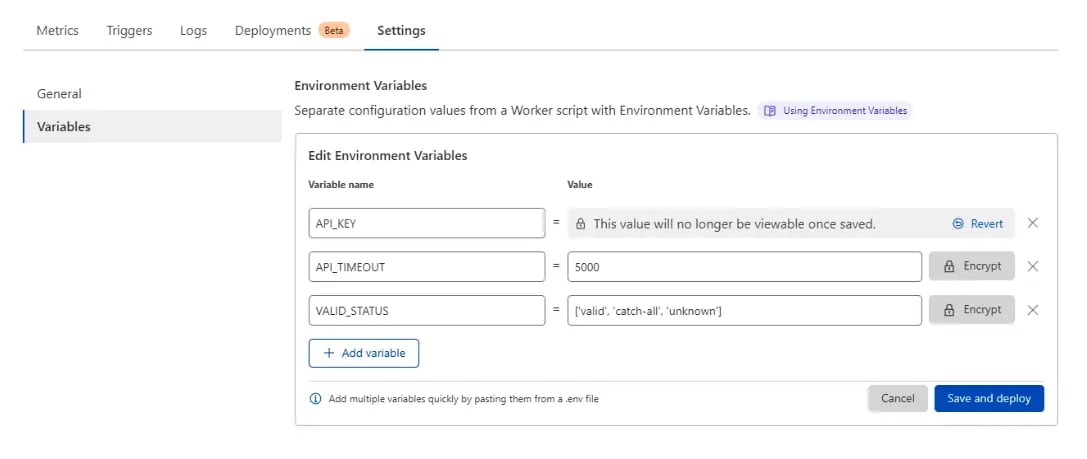 Example of how to create variables to use in the ZeroBounce Cloudflare Worker integration
Variable name Value API_KEY (Retrieve your API and apply here) API_TIMEOUT 5000 VALID_STATUS [‘valid’, ‘catch-all’, ‘unknown’] For more in-depth explanation:
● API_KEY - Your ZeroBounce API key - Retrieve it from your account
● API_TIMEOUT - Time in milliseconds
● VALID_STATUS - Your accepted validation status codes. You can find more available email validation status codes and learn about them here
- For added security, click Encrypt next to your API_KEY variable.
- Click Save and deploy. Your results should appear as they do in the image below.
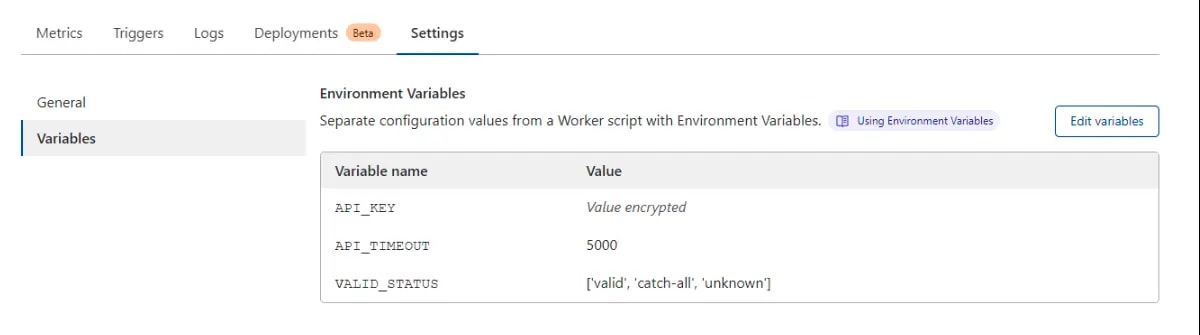 Example of what environment variables look like in Cloudflare Worker
Step 4 - Add a binding
- On the Worker details navigate to the Settings tab -> Variables, find the section titled KV Namespace Bindings. Click Add binding.
- Under “Variable_name,” enter LOGS.
- Under “KV Namespace,” select the namespace you created in step 1.
- Click Save and deploy.
 Screenshot of how to add a binding for a namespace in Cloudflare Worker
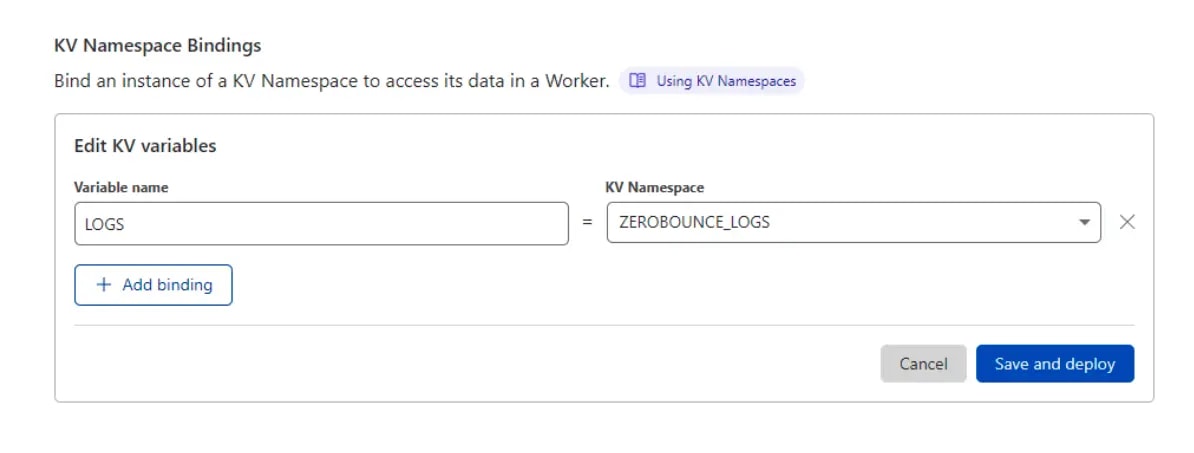 Example of how to create logs for the ZeroBounce Cloudflare Worker email validation integration
The result should appear like the example below
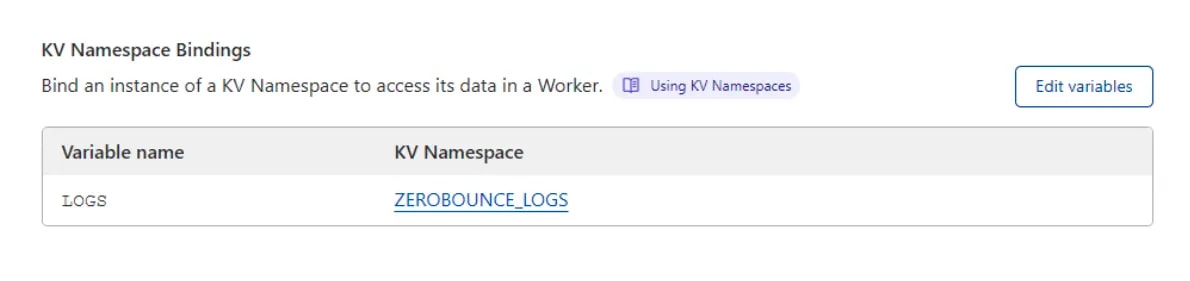 Example of a new LOGS variable for the ZeroBounce Cloudflare Worker integration
Step 5 - Add the Worker Script
- Click on the Quick Edit button on the Worker details page.
- Copy the worker script from here and paste it on the left hand side of the page:
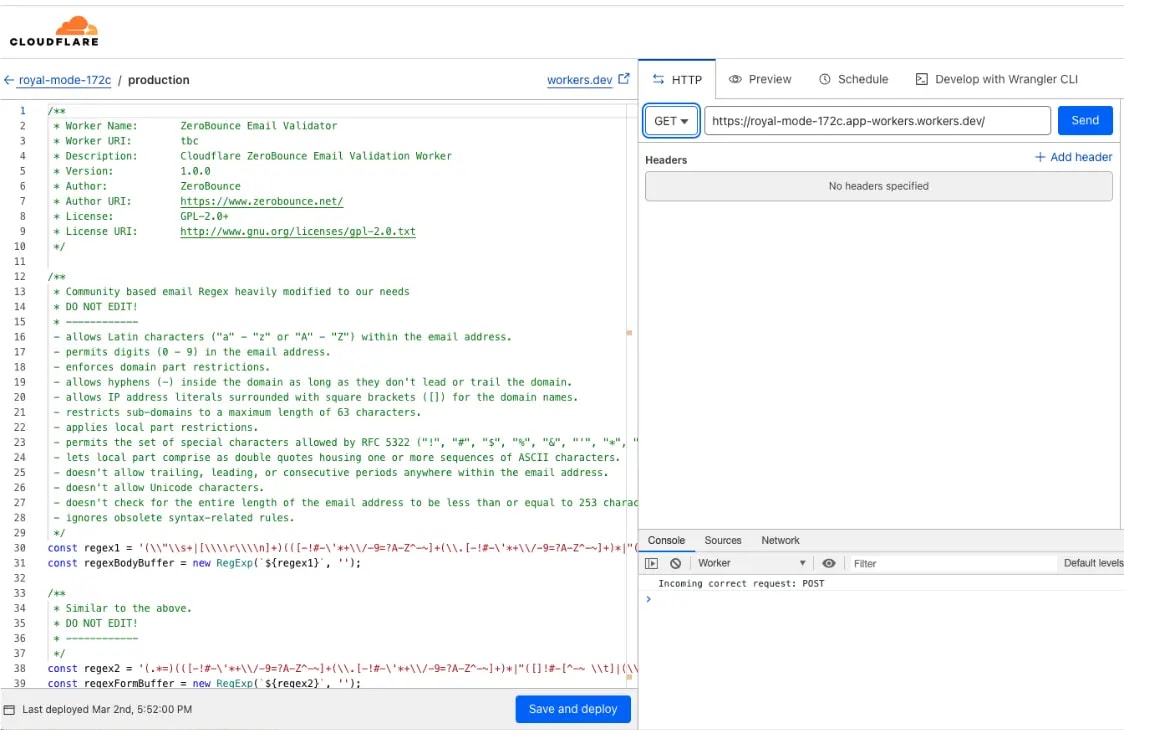 Cloudflare Worker page that shows where to add the worker script
 - Click Save and deploy.
- Your worker script has now been updated and is ready to be used.
Step 6 - Triggers
- Click on the Triggers tab.
- Under the section titled “Routes,” click Add route.
- In the “Route” field, enter the website URL where you want to run the worker.
- Use the “Zone” dropdown to select a zone that matches the entered URL.
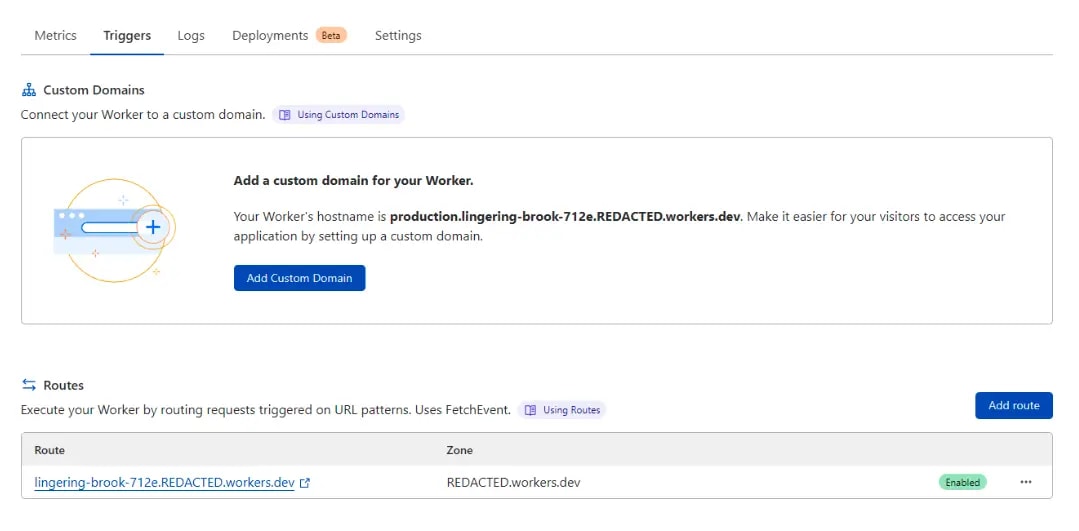 Cloudflare Worker menu that shows where to add triggers and routes for the ZeroBounce integration
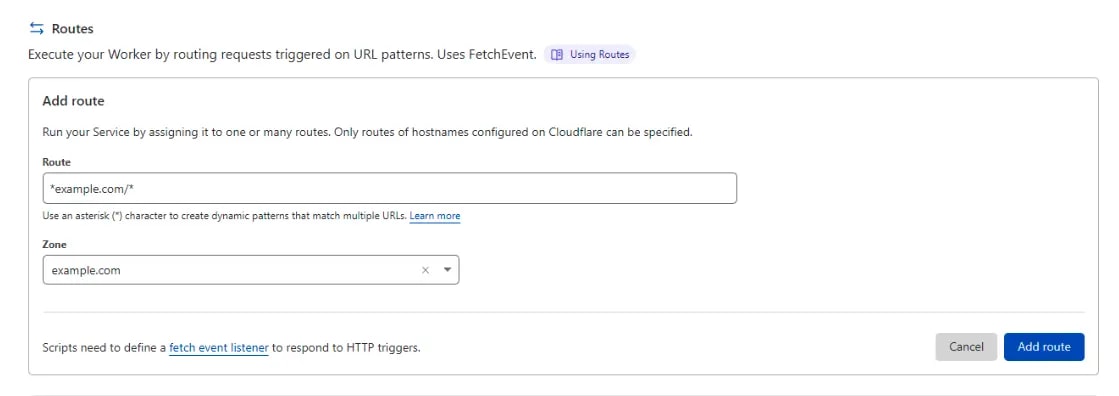 Example of how to create a route and zone for your Cloudflare Worker when using ZeroBounce email validation
Example
Route - "example.com"
Zone - example.com
By specifying this pattern, you are telling the worker to
- Match all subdomains of “example.com”
- Match all URLs of “example.com”
This is the most straightforward method of applying the worker. However, if you already have an existing worker on this route, you can run the worker on /contact only, for example.
With this, the installation is complete. You can test the Cloudflare Worker integration by entering an email on one of your website forms. You can then check the logs in your Worker KV namespace for the results.
Since this is key-value storage, each Log entry is prefixed, so you can also list all the records starting with a particular prefix. For example, you might want to see the records from a specific date, email, or URL.
The below example is a log prefix with a temporary email on a contact form.
{2023-02-25}-{caligyje@brand-app.biz}-{/.testing/contact.php}-{07:49}-47.373
You can use the following method to list logs by a specific prefix, for example, to list all logs from the 25th of February 2023:
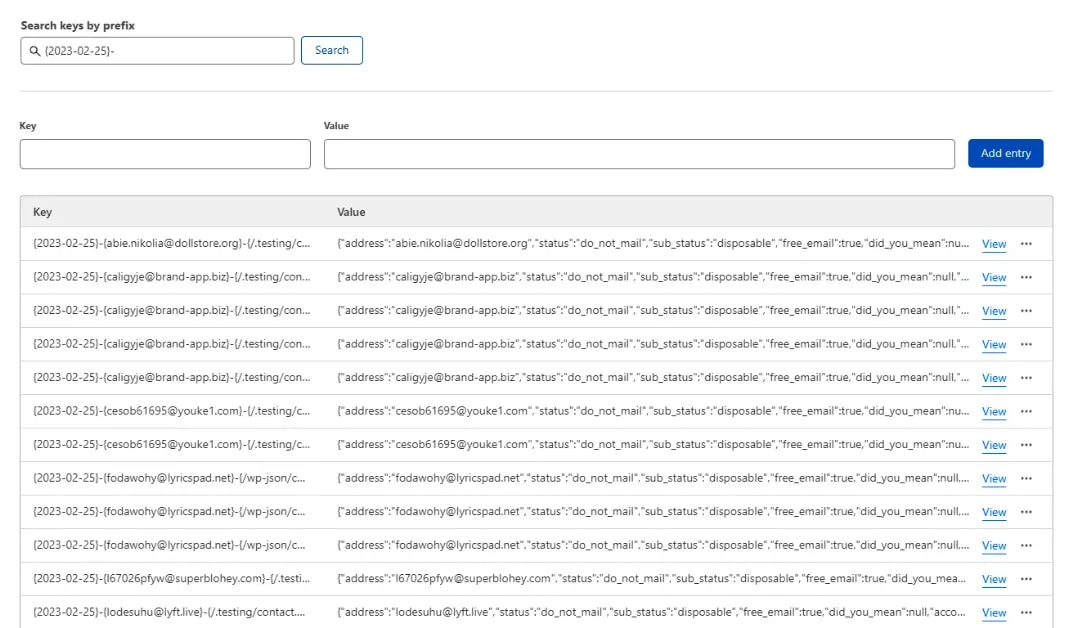 A log of results after using the ZeroBounce Cloudflare Worker integration
And for example, to list by email (you also need a date):
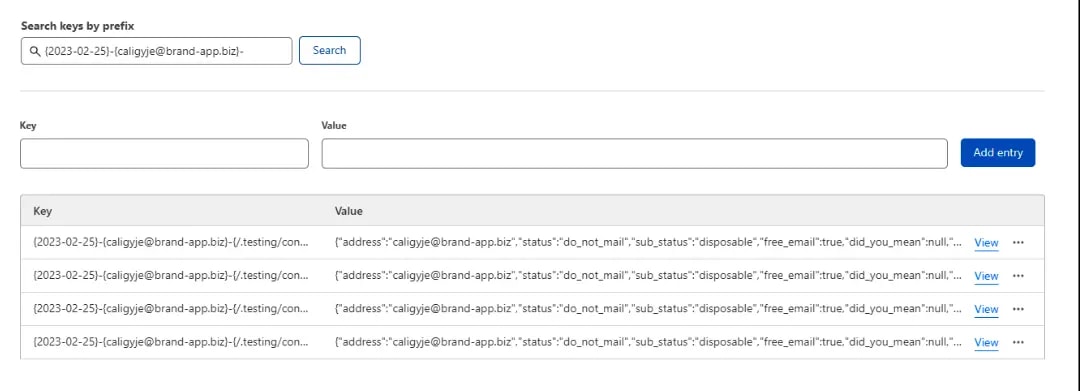 Example of how to search for specific email validation logs in Cloudflare Worker
Troubleshooting
If you find issues with the worker, please try the following troubleshooting steps.
Validation Issues
If email validation does not occur, check the following:
- Ensure that your form has an email input, preferably with the name/id: “email”.
- Double-check your environment variables.
- Ensure that you deployed the worker on the correct URL route.
If the above checks out, you may enable the logging of the worker by going to the Logs tab (next to Triggers) and enabling real-time logs. Afterward, go to your form and try again with an invalid email. Logs should be generated which can identify the issue.
Execution Issues
Another common problem is that the worker might break some API request or other functionality. While this is unlikely, a fix is available.
- Return to the Settings tab and click on Variables.
- Create a new variable called BYPASS_PATH.
- Enter the path you want to ignore. For example, you could disable validation on Login paths: ‘/login,’ ‘/logout,’ ‘/connect,’ ‘/signing’