Auto-Pay
Auto-Pay is a feature that allows you to replenish your account automatically when your credit balance gets low. This feature ensures that you don't run out of credits when using our API to validate emails.
Whether you use our real-time or bulk email validationⓘ API, or enjoy the bulk email scoringⓘ API, Auto-Pay streamlines your process and saves you time.
Also, Auto-Pay comes in handy if you need to clean email lists regularly and want to make sure you always have enough credits in your account. Many of our customers enjoy it.
Next, you can find the AutoPay settings in the Billing section of your profile, accessed from the top-right menu. Click the "Set Up" text to expand the AutoPay settings. Once the settings are expanded, you can input the number of credits to purchase in the first field - and the credit threshold in the second field. When credits in your account fall below this threshold, you will automatically purchase the number of credits from the first field.
Next, choose your email verification credit threshold and try to avoid setting it at a low value. This helps you avoid any issues that might occur when we process your credit card payments.
Finally, be sure to click Save and enable the toggle switch (purple is ON). Once you do that, Auto-Pay will be active, so you don’t have to worry about purchasing more credits manually.
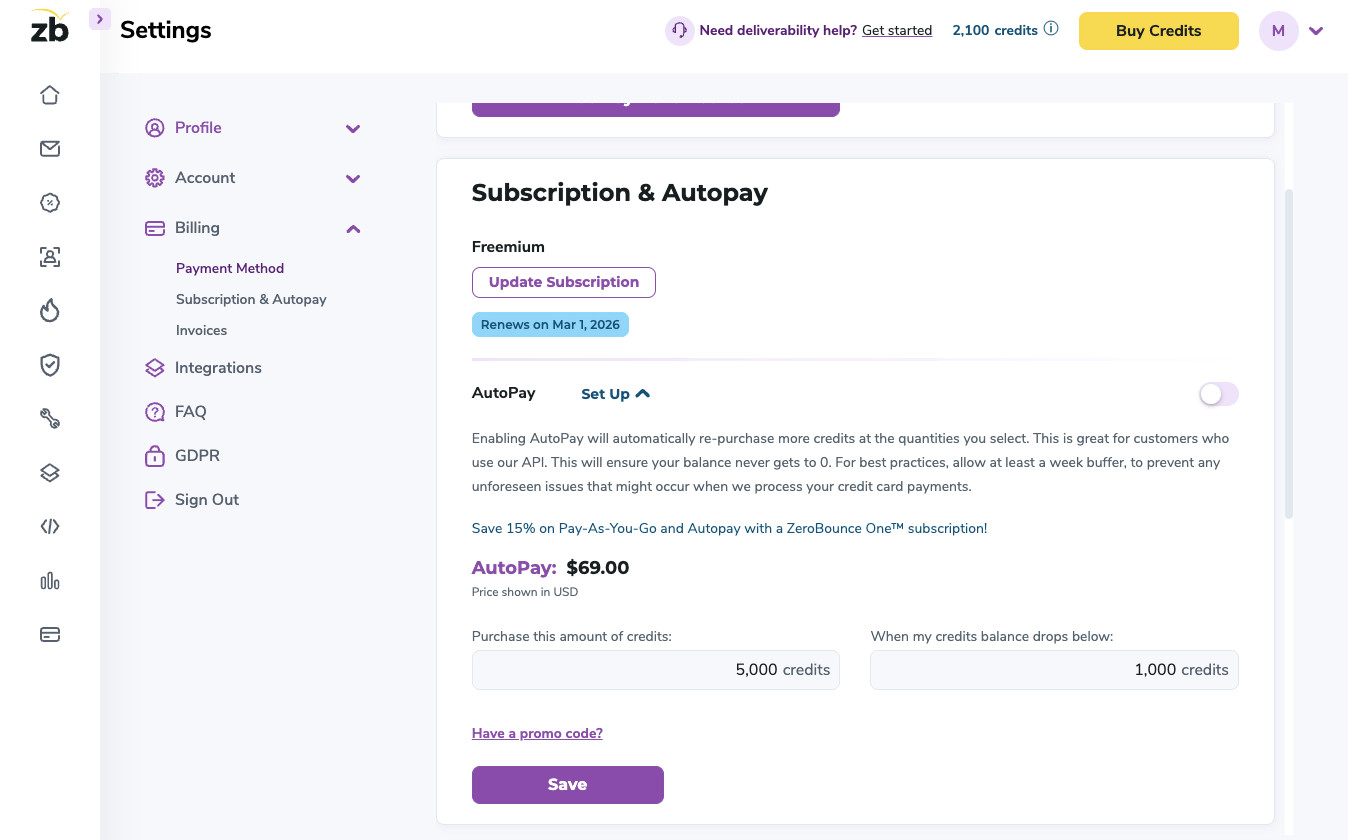
Auto-Pay Screen
You can deactivate AutoPay at any time.
Need help? Get in touch with our Customer Support team – we’re here for you 24/7.