YOUR ZEROBOUNCE ACCOUNT
Changing Your Email

Do you need to change the email address associated with your ZeroBounce account?
First, please note that changing your email address also changes your sign in ID. Once your email is changed, you will receive an email at your current email address with a validation link that you must click for the change to take effect.
REMEMBER: Your new email will become your current sign in.
Now, let us guide you through the process!
Step 1:
Click on your Profile on the top-right menu. Then click or scroll down to the “Change Email” section
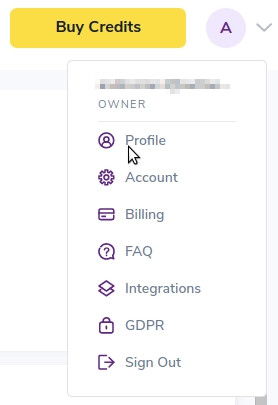
Reach your account Profile from the top-right menu
Step 2:
Choose the new email address you'd like to use when you sign in to your zerobounce.net account. After you type it in, you can click on "Change Email."

New Email and Verify New Email fields under the Change your Email section
Step 3:
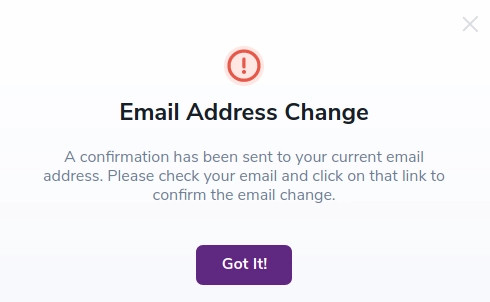
This message is going to appear on your screen:
Step 4:
Go to your email, where you will find this message from us. Click on "Approve Change."
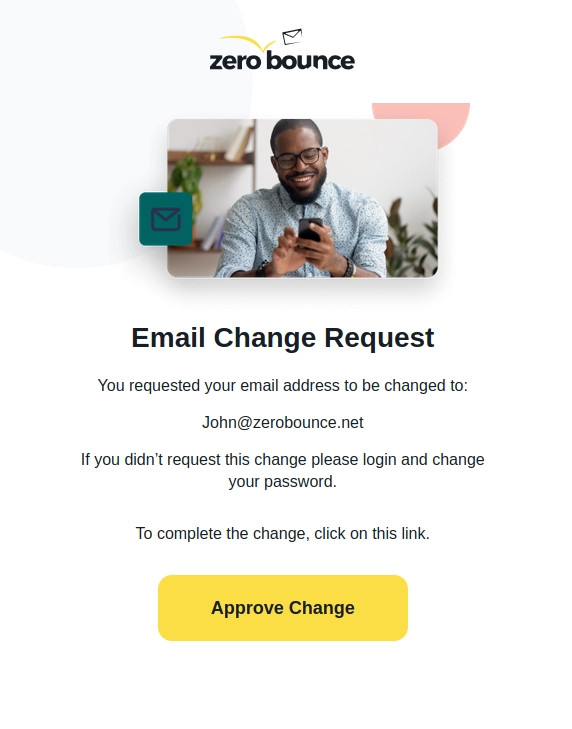
Confirmation email through which you can approve your account email change
Step 5:
Now you have to approve the change on your new email address, repeating step 4.
Once you approve the change on your new email, we will confirm it and safely change your email address.Step 6:
Now you can sign in with your new email address.
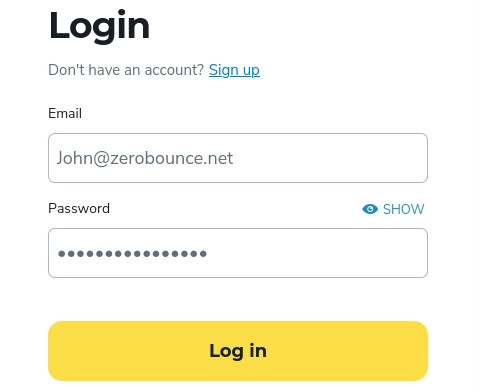
Your ZeroBounce account sign in page with the changed email
Need help changing your ZeroBounce email address? Our team is here to help – we're available 24/7 to assist you. Get in touch.
Changing Your Password
Need to change your ZeroBounce password? Below you'll find all the info you need.
Changing your ZeroBounce password to a secure password that only you know, and that no one else can guess, protects your private information from unauthorized access.
We recommend, but do not require a password:
- with 8 or more characters,
- including numbers,
- and including both uppercase and lowercase letters and special symbols.
To ensure your account's security, we do require a password of 6 characters or more.
Now, let's guide you through the process of changing your password. It's really quick and simple.
Step 1:
Click on your "Profile" on the top-right menu. Then click or scroll down to the "Change Password" section
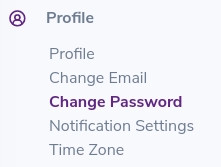
Change Password section found under your account profile
Step 2:
Now fill in the three shown fields: Current Password, New Password and Confirm New Password.
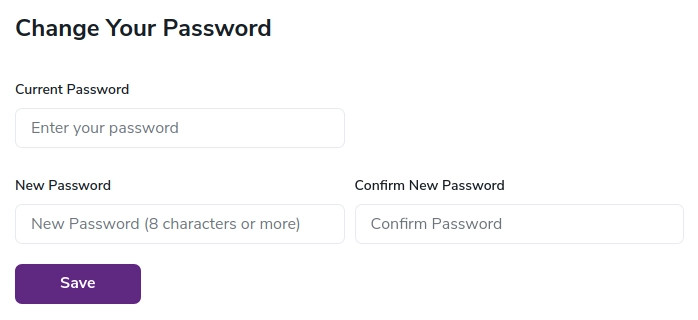
Current password, new password and confirm new password fields for changing your account password
Step 3:
Once you've double-checked your new password, click the "Save" button to confirm.
That's it! You will be signed out and you can now sign in again with your new password.
Need help changing your password? Reach out to our 24/7 customer support team.
Two-Factor Authentication
We implemented two-factor authentication to serve as an extra layer of security. It is an authentication mechanism that double checks if your identity is legitimate.
Traditionally, when you want to sign in to your account, you are prompted to authenticate with a username and a password. Two-factor authentication will work as an extra step in the authentication process that helps us confirm your identity and ensure the maximum security level for your account.
If you wish your account to be more secure, we strongly encourage you to activate the Two-Factor Authentication feature as soon as possible.
ENABLING TWO-FACTOR AUTHENTICATION
Step 1:
Click on your Profile on the top-right menu. Then find the Two-Factor Authentication switch in the "Change Password" section. Toggle the switch to ON.

The two-factor authentication toggle switch for your ZeroBounce account
Step 2:
In order to activate Two-Factor Authentication, you need to install Authy (IOS/Android) or Google Authenticator (IOS/Android) on your phone. After you install one of these and configure it, you are ready to move on to the next step.
Step 3:
Great! Now use Authy or Google Authenticator to scan the QR Code or just manually type the provided code in the field as shown below.
REMEMBER: For security purposes, the code is refreshed every 30 seconds.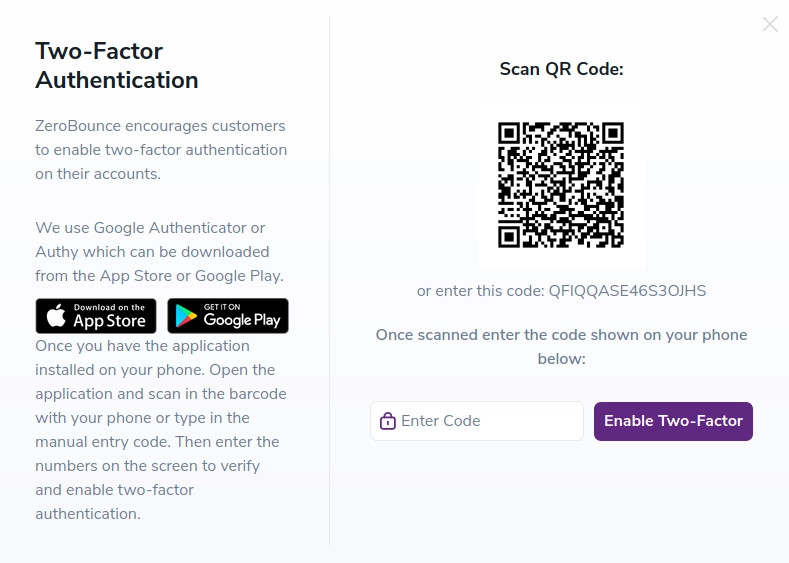
QR code window for enabling Two Factor Authentication on your ZeroBounce account
Step 4:
Congratulations! You now have an extra layer of security activated on your account.
Step 5:
When you sign in next time, after you enter your username and password, you will be prompted to provide the six-digit code from your authenticator app in order to authenticate successfully.
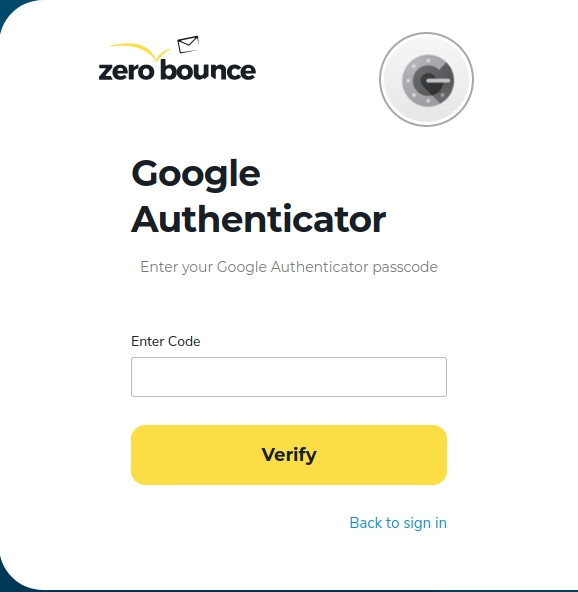
Field for inserting your Google Authenticator passcode for your ZeroBounce account
RESET YOUR PHONE FOR TWO-FACTOR AUTHENTICATION
If you no longer have access to the devices where you installed the authenticator app, don't worry, your account is still secure!
Reset instructions for Authy: In order to reset your phone at Authy, just follow these instructions.
Reset instructions for Google Authenticator:
When you first setup Two-Factor Authentication, you received a backup code. You will need that code in order to reset your phone for Google Authenticator.
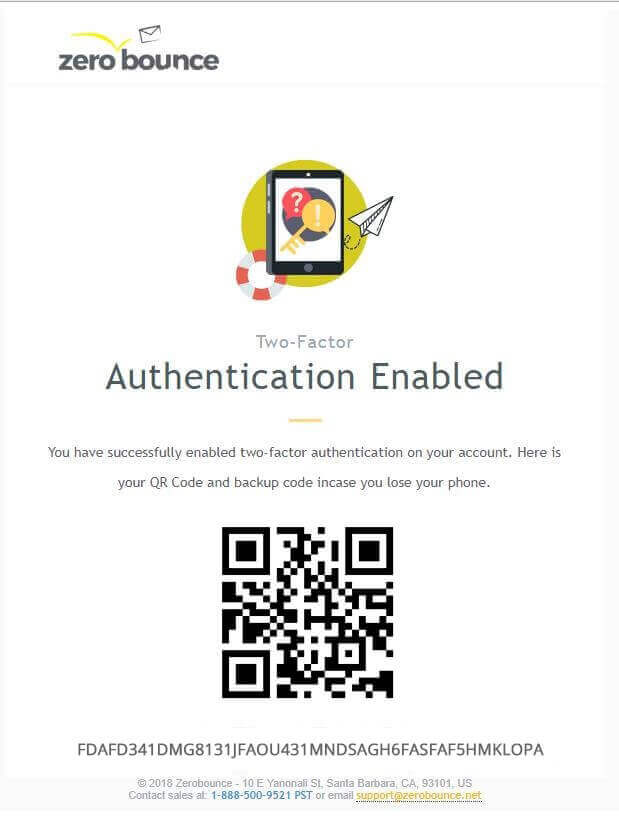
You will be emailed a google Autentificator QR Code
- Install Google Authenticator
- Choose 'Manual Entry'
- Enter your email that you use to sign in on ZeroBounce account.
- Enter your backup code.
- Congratulations! You now have successfully resync your new phone with ZeroBounce Two-Factor authentication.
DISABLE TWO-FACTOR AUTHENTICATION
In order to disable Two-Factor Authentication, click on your account Profile on the top-right menu, go to the "Change Password" section, and toggle the Two-Factor Authentication switch to OFF.
Changing Your Time Zone
Changing your ZeroBounce time zone settings is helpful if you move to a country with a different time zone.
It's really quick and simple to do.
To begin, sign in to your ZeroBounce account. From there, click on your Profile on the top-right menu. Then click on or scroll down to the "Time Zone" section.
Step 1:
Reach the Time Zone settings section
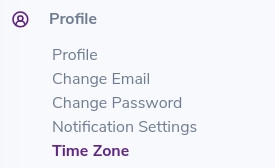
TimeZone section found under the Profile of your ZeroBounce account
Step 2:
Set your new time zone preferences

Region or country selection for TimeZone settings for your ZeroBounce account
That's it! You're all set to use your email validator in the new time zone!
Cleaning your list regularly ensures you maintain a healthy sender reputation and high deliverability on your newsletters and email campaigns. Remember to validate your email database at least once per quarter or whenever you see signs that suggest low inbox placement – such as low open rates and a bounce rate higher than 2%.
If you're not adding many contacts to your email list, then make the most of the free email verification credits you get from ZeroBounce!
Every month, we replenish your account with 100 free email validationⓘ credits. Alternatively, you can score catch-all email addresses using the same credits – our email scoringⓘ service will help you figure out which ones are active.
Need help verifying your list or changing your time zone? Our team is available 24/7 to guide you.
Notification Settings
Do you want to know when your email list is ready for download or when your account is accessed by a new IP address? Below you'll find the info you need to set up your ZeroBounce notifications.
ZeroBounce can send out email notifications to keep you up to date about different events and useful information.
We understand that some notifications are important to some customers, but might not be important to you. That's why you have complete freedom to customize your preferences and get alerted only about the things that matter to you.
To begin, sign in to your ZeroBounce account. From there, click on your Profile on the top-right menu. Then click on or scroll down to the "Notification Settings" section.
Please use the buttons below to set your preferences. You can choose whether you want to know:
- when we finished cleaning your email list so you can download it
- when we replenished your monthly 100 free email validationⓘ credits
- or when your credit balance falls under a certain threshold.
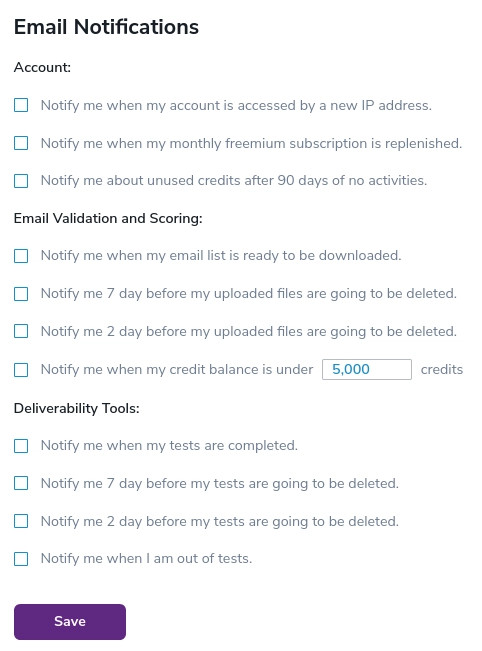
Also, we can notify you 7 and 2 days before we delete your email verification files from your account. We do not store these results for more than 30 days, so please make sure you retrieve them in time.
Need help with your ZeroBounce settings? Drop us a line – our team is here to assist you 24/7.
Account Assist
At ZeroBounce, user privacy and data security are our main concern. In order to keep your data safe, no one in our organization can access your account without your authorization.
However, there may be times when you need help with your account. In the"Account Options"page you can grant a Customer Success Technician temporary access to your account. There is no need to share your password. In fact, nobody should ever have to ask for the password of your account.
Step 1:
In order to grant us temporary access to your account, first sign in and go to your Account options from the top-right menu.
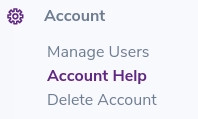
Account Help section under the Account settings
Step 2:
Under the Account Help section, you will notice the Account Assist option and its corresponding toggle switch. Turn the switch ON to grant us temporary access. You will know temporary access is active if the toggle switch is purple.

Account Assist option toggle switch in your ZeroBounce account settings
Step 3:
Once enabled, you will see "expires in 7 days…" next to "Account Assist" - You can disable the Account Assist feature at any time by clicking on the toggle button again. If the button is no longer purple, Account Assist is disabled. If you happen to forget to turn off Account Assist, it will automatically shut off after the timer expires.

Account Assist toggle switch turned on in your account settings
Invoices
Do you need to double-check an invoice or forward it to your accounting team? We store your complete invoice history for your convenience and accounting purposes.
To access your invoice history, first you have to sign in to your ZeroBounce account.
Once you are signed into your ZeroBounce account, you can find all your invoices in the top-right menu under the Billing section.
You will see an image similar to the one below with your information.
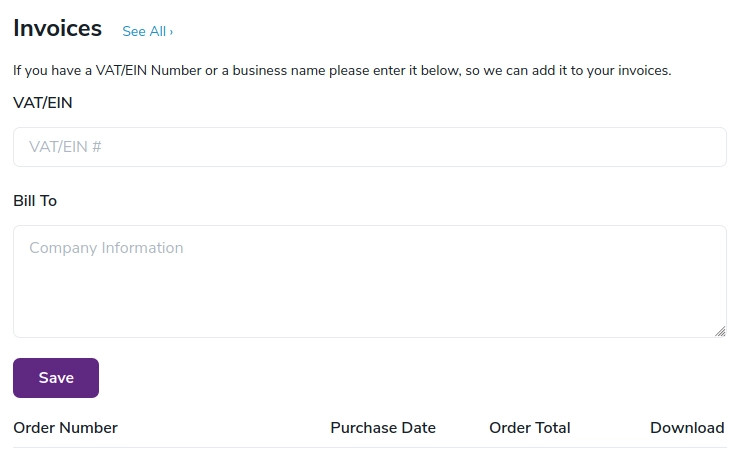
The invoices section of your ZeroBounce account with the text fields for tax number and Bill To details
You can download invoices in PDF format by clicking the respective download button next to each invoice. You can also add your VAT/EIN and Business Name to your invoices if your accounting department requires it.
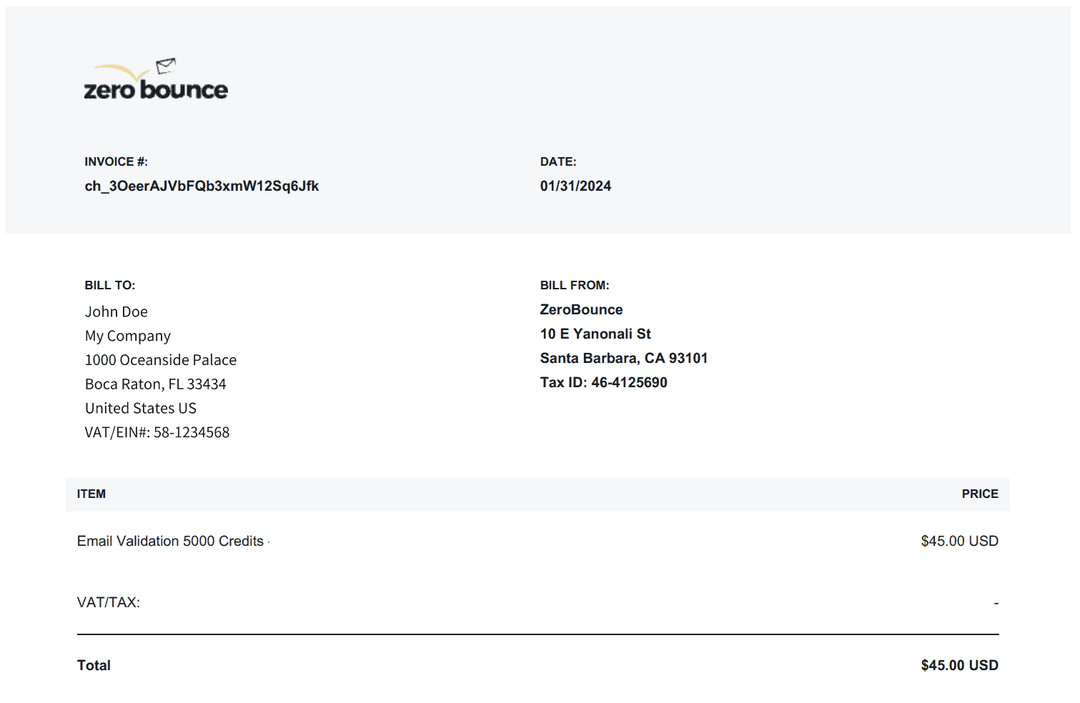
Example ZeroBounce Invoice
Using our email verification tools is easy, and so is accessing your invoices –at any time.
Do you have any questions or need help downloading an invoice? Please contact us at support@zerobounce.net or connect with our team via the live chat. Someone is always there to guide and assist you – our team is available 24/7, 365 days a year.
Deleting Your Account
We don't want to see you leave, but if you decide to delete your account, below you will find all the info you need.
First, you should know that deleting your account will:
- delete all your email validations, so you won't be able to access that data anymore
- also, deleting your account will remove your access to the Members Area.
Many companies incorporate email verification into their digital marketing workflows, so you may need to validate your email list again in a while. If you want to create another account on zerobounce.net in the future, you will be able to do so with the same email address. We won't hold a grudge.
You can always come back and verify your list at 99.6% accuracy. Also, creating another account will give you access again to 100 free email validations a month.
To delete your account, sign in and click on "Account Options" on the left-hand menu. Then click on the "Delete Account settings" icon button in order to start the deletion process.
This will take you to the webpage below.
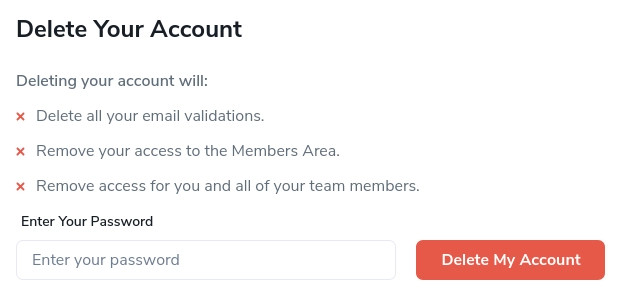
Deleting Your Account Screen.
Simply follow the on-screen instructions and type in your password. Then, click the Delete Account button. That's it!
Come back when you need to clean your email list again.
Team Accounts
MANAGE USERS
By setting up a team account, you can invite multiple users to our email validationⓘ platform. You will be able to assign a role to each user that grants different access levels to the system.
Currently there are four roles,Owner, Admin, Dev, and User that can be assigned to team members.
Each team account can only have one owner. The credit balance from the team owner will be the main source shared by all team members invited.
The table below shows the permissions matrix of the team account roles and actions.
Team Accounts Permissions
- ActionOwnerAdminDevUser
- Validate (upload files)YesYesYesYes
- Validate (download files)Yes. All team member's uploaded files.Yes. All team member's uploaded files.Yes. All team member's uploaded files.Yes. Only user's uploaded files.
- Single Email ValidatorYesYesYesYes
- Score (upload files)YesYesYesYes
- Score (download files)Yes. All team member files.Yes. All team member files.Yes. All team member files.Yes. Only user uploaded files.
- Email FinderⓘYes, All Team member's Email Finderⓘ SearchesYes, All Team member's Email Finderⓘ SearchesYes, All Team member's Email Finderⓘ SearchesYes, Only User Email Finderⓘ Searches
- Domain SearchYes, All Team member's Domain SearchesYes, All Team member's Domain SearchesYes, All Team member's Domain SearchesYes, Only User Domain Searches
- DMARC monitorsYesYesYesYes (All team monitors, read-only)
- Warmup AccountsYes, All Team member's Warmup AccountsYes, All Team member's Warmup AccountsYes, All Team member's Warmup AccountsYes (All team Warmup Accounts, read-only)
- Inbox TestYes, All Team member's TestYes, All Team member's TestYes, All Team member's TestYes, Only User Test
- Email Server TestⓘYes, All Team member's TestYes, All Team member's TestYes, All Team member's TestYes, Only User Test
- Blacklist monitorsYesYesYesYes (Only own monitors)
- ZB IntegrationsYesYesYesYes
- API - Keys & WhitelistingYesYesYesAssigned keys only.
- API - UsageYesYesYesAssigned keys only.
- UsageYesYesYesYes (Only own usage)
- Pay as You GoYesYesNoNo
- SubscriptionYesYesNoNo
- AutoPayYesYesNoNo
- Manage UsersYesYesNoNo
- IP-Based Conditional Access OptionYesYesYes (read-only)Yes (read-only)
- Password Expiry IntervalYesYesYes (read-only)Yes (read-only)
- Verify+ from ZeroBounceⓘYesYesYes (read-only)Yes (read-only)
- Email Validationⓘ RulesYesYesYesAll Team rules (read-only)
- Account Options – Transfer CreditsYesYesNoNo
- Account Options – Delete Your AccountYesNoNoNo
- Billing and InvoicesYesYesNoNo
- GDPR InformationYesYesNoNo
Manage Users under the Account Options is where you can create a team account and manage your team members.
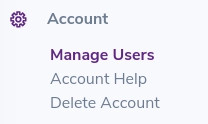
CREATE TEAM ACCOUNT
To create a team account, click Create Team Account button.
The system will then convert your ZeroBounce account to a team account, and you will be assigned as the team owner.
DELETE TEAM ACCOUNT
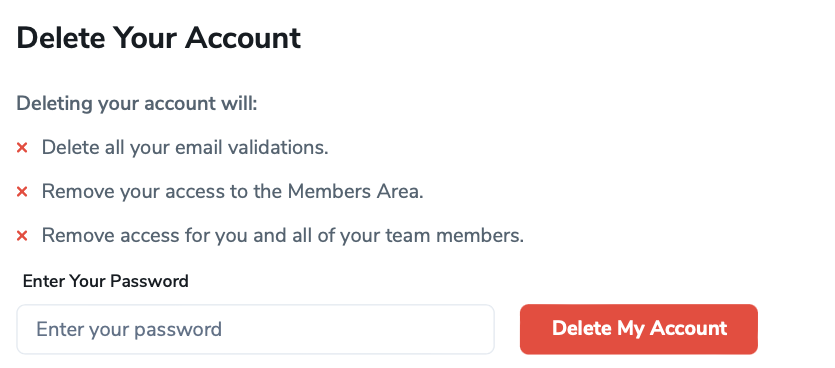
The delete your ZeroBounce account section with its password field and delete account button Deleting your account is permanent and will remove access to ZeroBounce for you and all of your team members.
ADD TEAM MEMBER
To add a new team member to your team, enter the new team member's email address, select their role, and click Save to complete the process.

Please note that if the email address you entered has already been registered with ZeroBounce and you would still like to invite this user to the team, you will need to ask the owner of that email address to sign in to ZeroBounce, then select either Change Your Email under Profile or Delete Your Account under Account options to make that email address eligible before resending the invitation.
After your changes have been saved, a team account invitation email will be sent to the email address you entered.
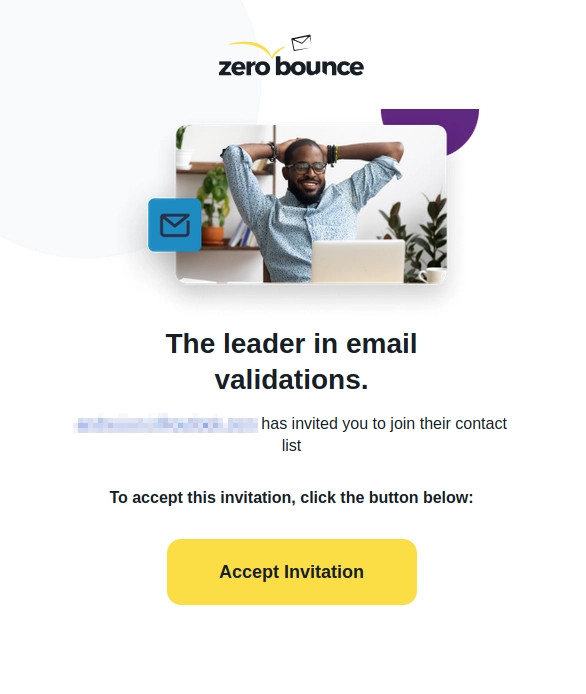
All new team members will need to click Accept Invitation from the Team Account Invitation email, then complete the steps on the Join Account page to join the team.
RESEND INVITATION EMAIL
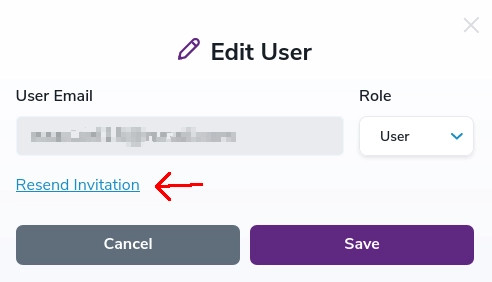
If the invited team member has not confirmed their account, you can resend the invitation email by clicking the pencil button and then clicking the "Resend invitation" link.
DELETE TEAM MEMBER
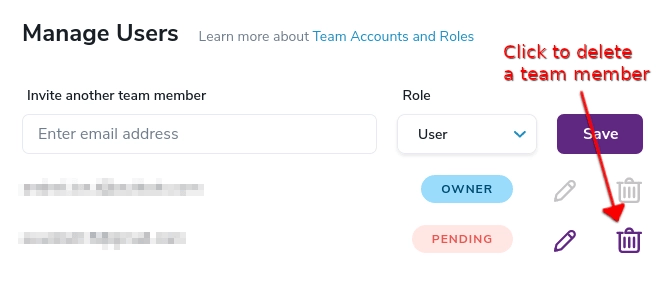
To delete a team member from your team, click the trash can icon on the right side of that team member's email address. Deleting a team member not only removes the person from the team, but also removes the person's access to ZeroBounce.
EDIT TEAM MEMBER
To edit a team member, click the pencil icon. If the new member has not been confirmed, you can change the member's email address. However, you'l need to resend the invitation email to the updated address. If the member has been confirmed, only the member's role can be updated. After entering your changes, click the Save button.
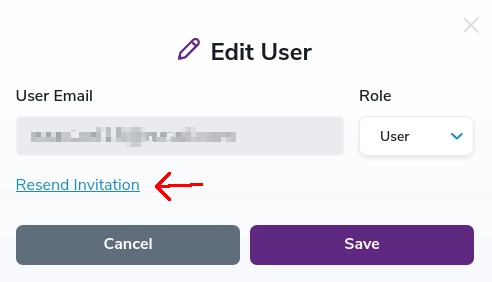
To edit a team member, click the pencil icon.
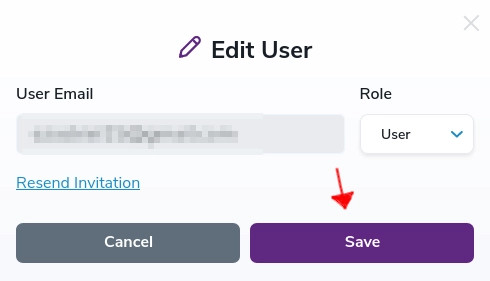
After entering your changes, click the Save button.
Agency Feature
1. What Is an Agency at ZeroBounce?
At ZeroBounce, an Agency is a trusted partner that uses our email validation and deliverability tools to help their own clients achieve better email performance.
Think of the ZeroBounce Agency Partner Program as more than a commission setup. It's a partnership designed to help your agency shine. By partnering with ZeroBounce, you can offer your clients cleaner email lists, stronger deliverability, and better campaign results — all while building recurring revenue for your business.
As an agency partner, you don't just recommend ZeroBounce. You integrate our platform into your services, positioning yourself as a reliable expert in email validation and deliverability.
👉 Learn more about the Agency Partner Program here:
Agency Partner Program2. Customer Experience
From your client's perspective, the experience is simple, seamless, and results-driven.
Better Email Results, Without the Complexity
Your clients benefit from ZeroBounce’s industry-leading email validationⓘ technology, which removes invalid, fake, and risky email addresses. This helps them:
- Reduce bounce rates
- Improve inbox placement
- Protect sender reputation
- Increase engagement and ROI
All without needing to manage a separate technical platform.
Everything Managed by Their Agency
Clients work directly with you, their agency, while you handle the technical side using ZeroBounce. This means:
- No additional tools to learn
- No complicated setups
- No guesswork about deliverability
They simply see cleaner lists and better campaign performance.
Expert Guidance They Can Trust
Instead of relying on automated tools alone, your clients get expert guidance from your agency — backed by ZeroBounce's proven technology. This positions you as a strategic partner, not just a service provider.
3. Agency Experience
For agencies, ZeroBounce becomes a powerful extension of your service offering.
Offer More Value to Your Clients
You can include email validation, list hygiene, and deliverability support as part of your existing services — or offer them as standalone solutions. This allows you to:
- Differentiate your agency
- Deliver measurable results
- Strengthen long-term client relationships
Grow Recurring Revenue
By using ZeroBounce as your email validation partner, you can create new recurring revenue streams while improving client retention. Better deliverability leads to better results — and better results keep clients coming back
A True Partnership with ZeroBounce
They simply see cleaner lists and better campaign performance.
As an agency partner, you're supported by ZeroBounce with:
- Scalable validation tools and APIs
- Reliable infrastructure built for agencies
- Resources to help you onboard and support clients efficiently
You focus on growing your agency and serving your clients — we handle the email validation expertise behind the scenes.
4. Getting Started with the Agency Feature
ZeroBounce allows you to give a trusted agency permission to manage your account on your behalf. This makes it easy to collaborate while keeping full transparency and control.
Step 1: Add an Agency
In your account settings, you`ll find a new Agency Access section where you can assign an agency to manage your ZeroBounce account.
Once added, the agency will be able to assist with email validation and deliverability tasks based on the permissions you grant.

Step 2: Agency Notification
After you add an agency, they`ll receive an email notification confirming that you`ve granted them permission to manage your account.
No further action is required from you at this stage.
Step 3: Agency Access & Account Switching
Once access is granted:
- A Switch Account option becomes available in the agency`s account settings.
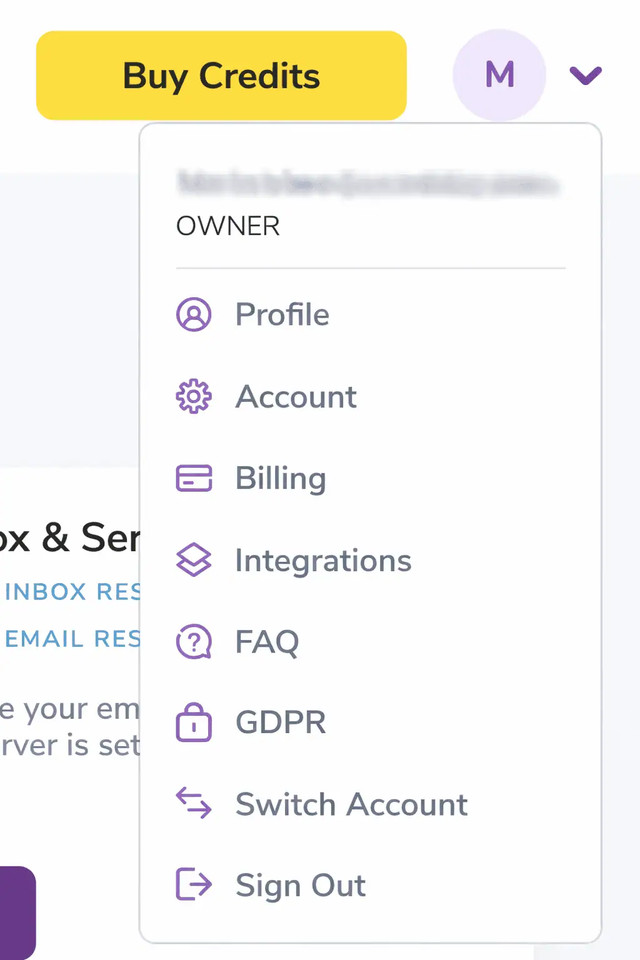
- When the agency selects this option, a pop-up appears displaying all customer accounts they`re authorized to manage.
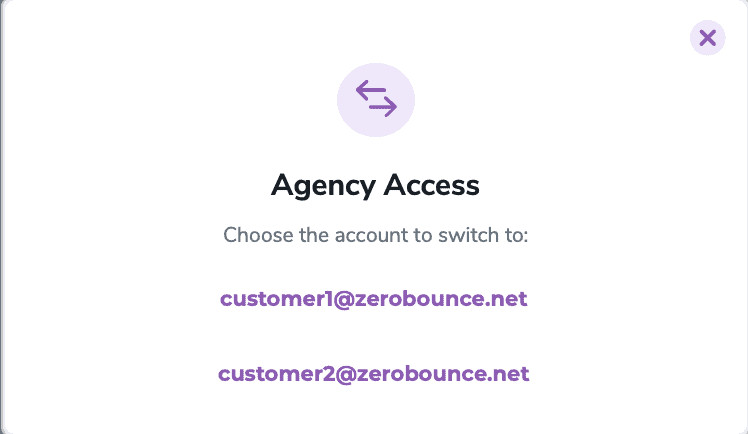
- The agency can easily switch between accounts without needing separate logins.
At all times, your account remains secure, and access is limited to the permissions you've approved.
5. Registering as an agency
Step 1: Create a ZeroBounce account
Step 2: Apply to become an agency
Register as an agencyConfigure Okta SSO
To configure a custom Okta SSO solution for use with ZeroBounce, please contact ZeroBounce Support.
How to set up Okta to utilize the same user via single sign-on (SSO) in ZeroBounce
Step 1:
Set up Okta as an Identity provider.
Sign in into your Okta admin account. Navigate to Applications within the main navigation, and click 'Create App Integration.',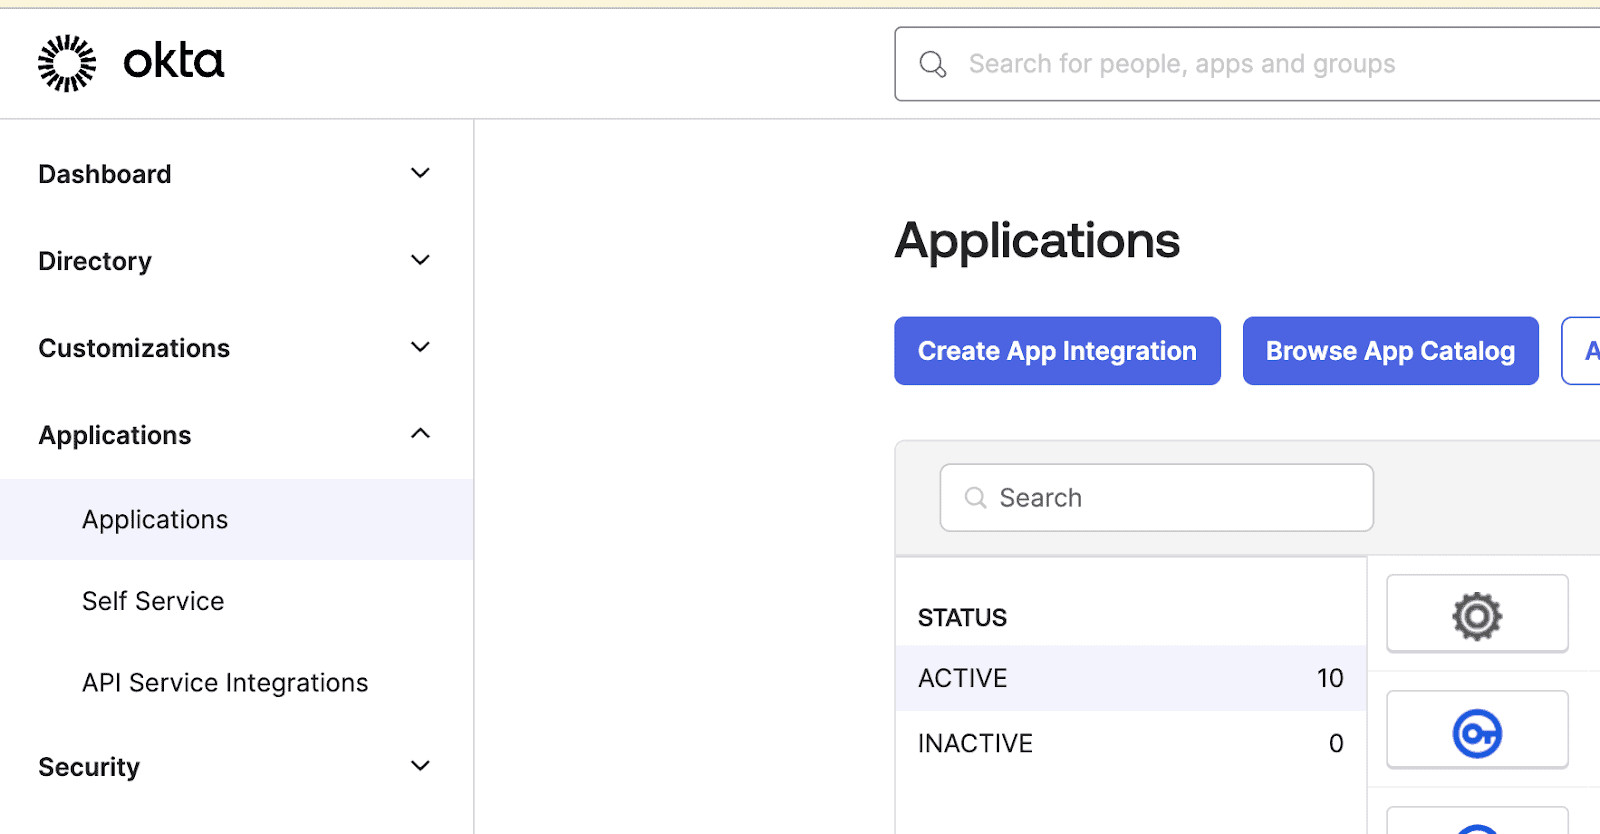
Okta account dashboard with the Applications menu highlighted
Step 2:
Select 'OIDC' as the sign-in method, then select 'Web Application' as the application type, and click 'Next.'
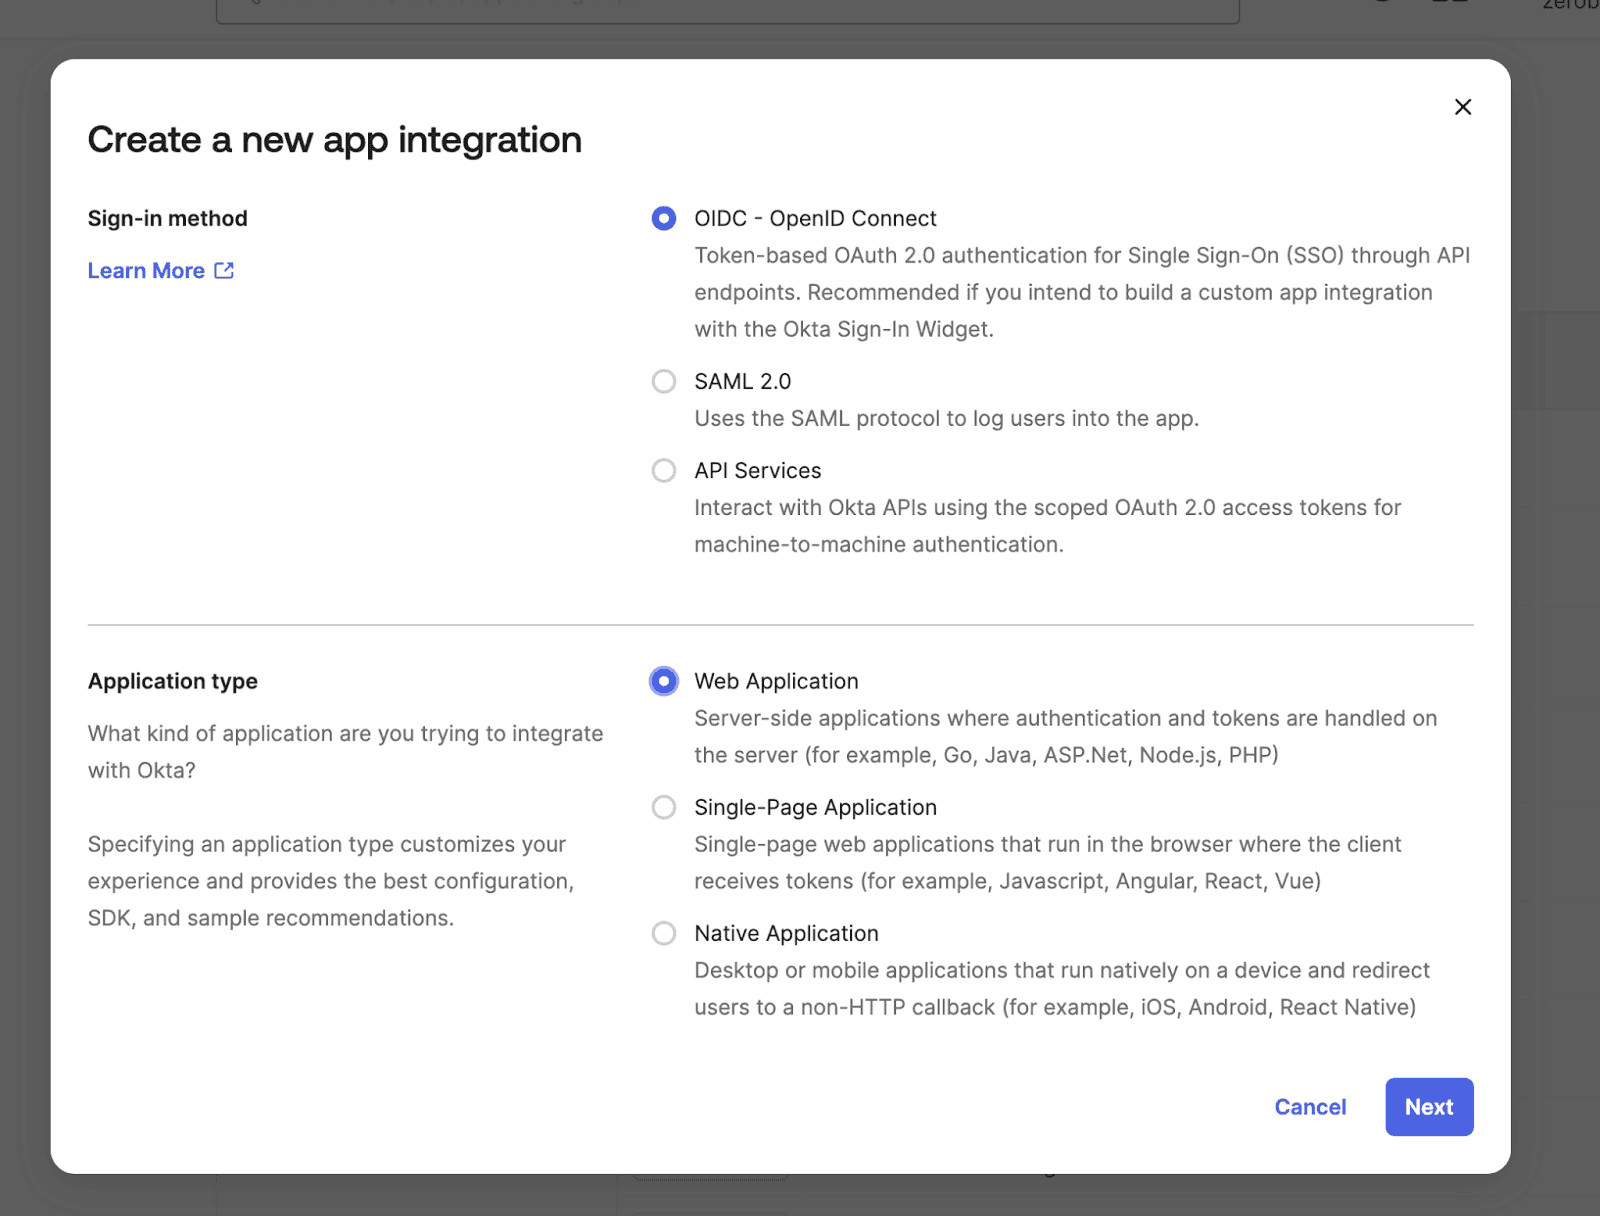
Okta's Create a new app integration menu with OIDC and Web Application selected
Step 3:
Give a name to the application (e.g., 'Zerobounce IDP auth server'). Make sure 'Authorization Code' is selected (should be selected by default).
In the Sign-in redirect URIs field, add the following:
https://okta.zerobounce.net/oauth2/v1/authorize/callback,
In the Sign-out redirect URIs field, add the following: https://okta.zerobounce.net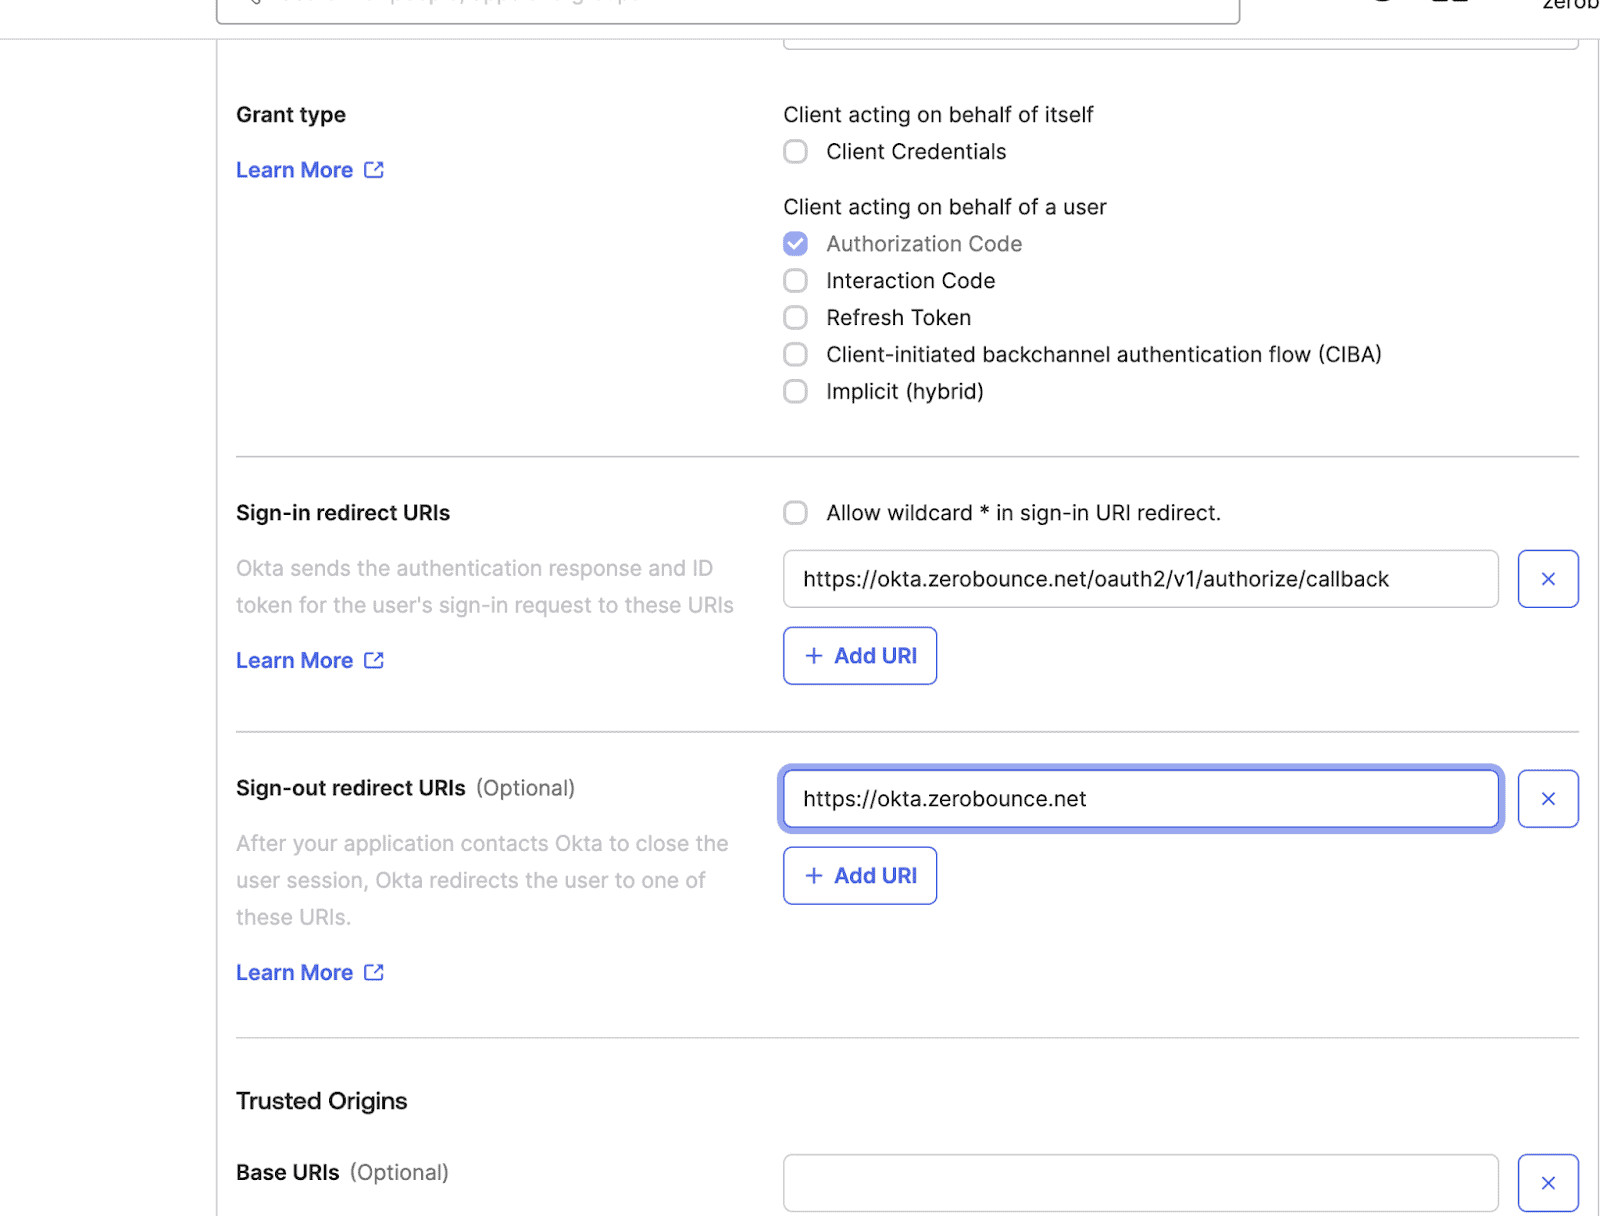
Step 4:
In the Controlled Access section, choose the option best suited for your organization. You can allow all users from your organization to sign in (or register) or select a specific group of users. You can also select an option later. Click 'Save.'
Step 5:
Please make sure that the application is under the correct authentication policy. You can enforce your enterprise authentication policy under the Sign On tab. To do this, scroll to the bottom and change the authentication policy.

An Okta menu showing the user authentication policy selector
Step 6:
You will need to provide ZeroBounce with the 'Client ID' and the Client Secret key for the created application.
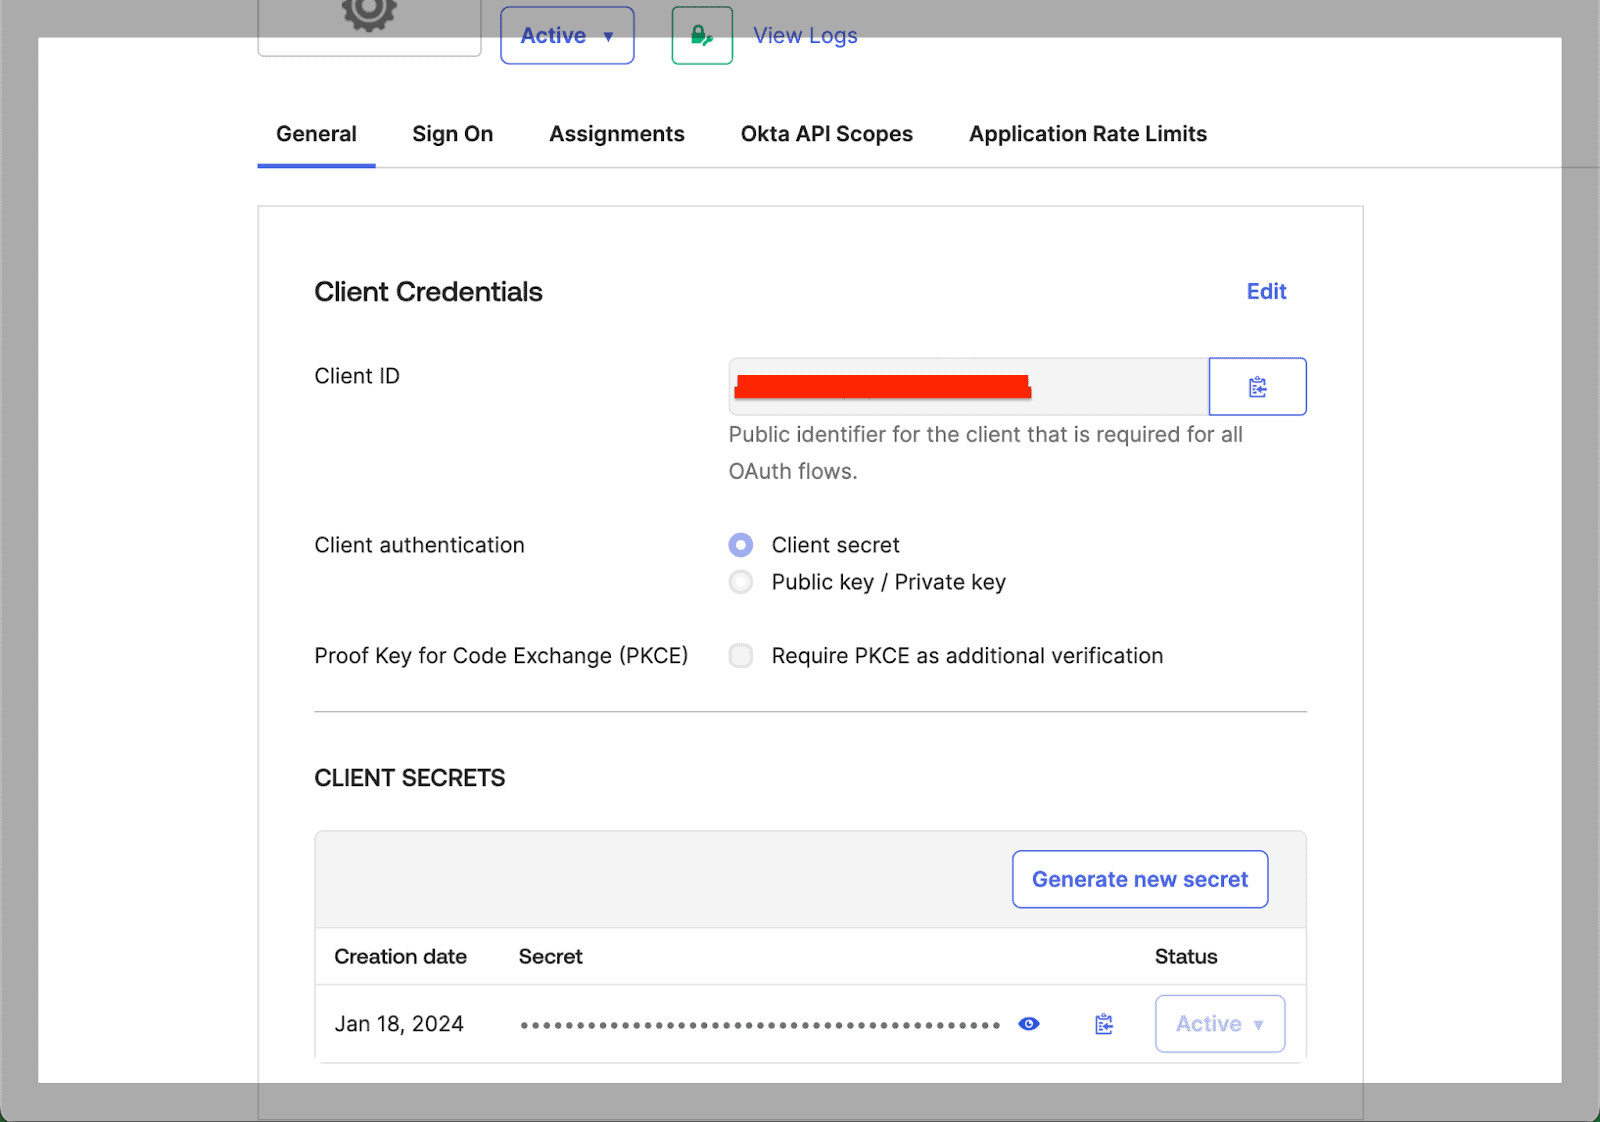
Okta general settings menu that shows Client Credentials and Client Secrets with a red bar through the Client ID
You'll also need to provide the 'Custom Domain,' which you can find under Customizations, followed by 'Brands'
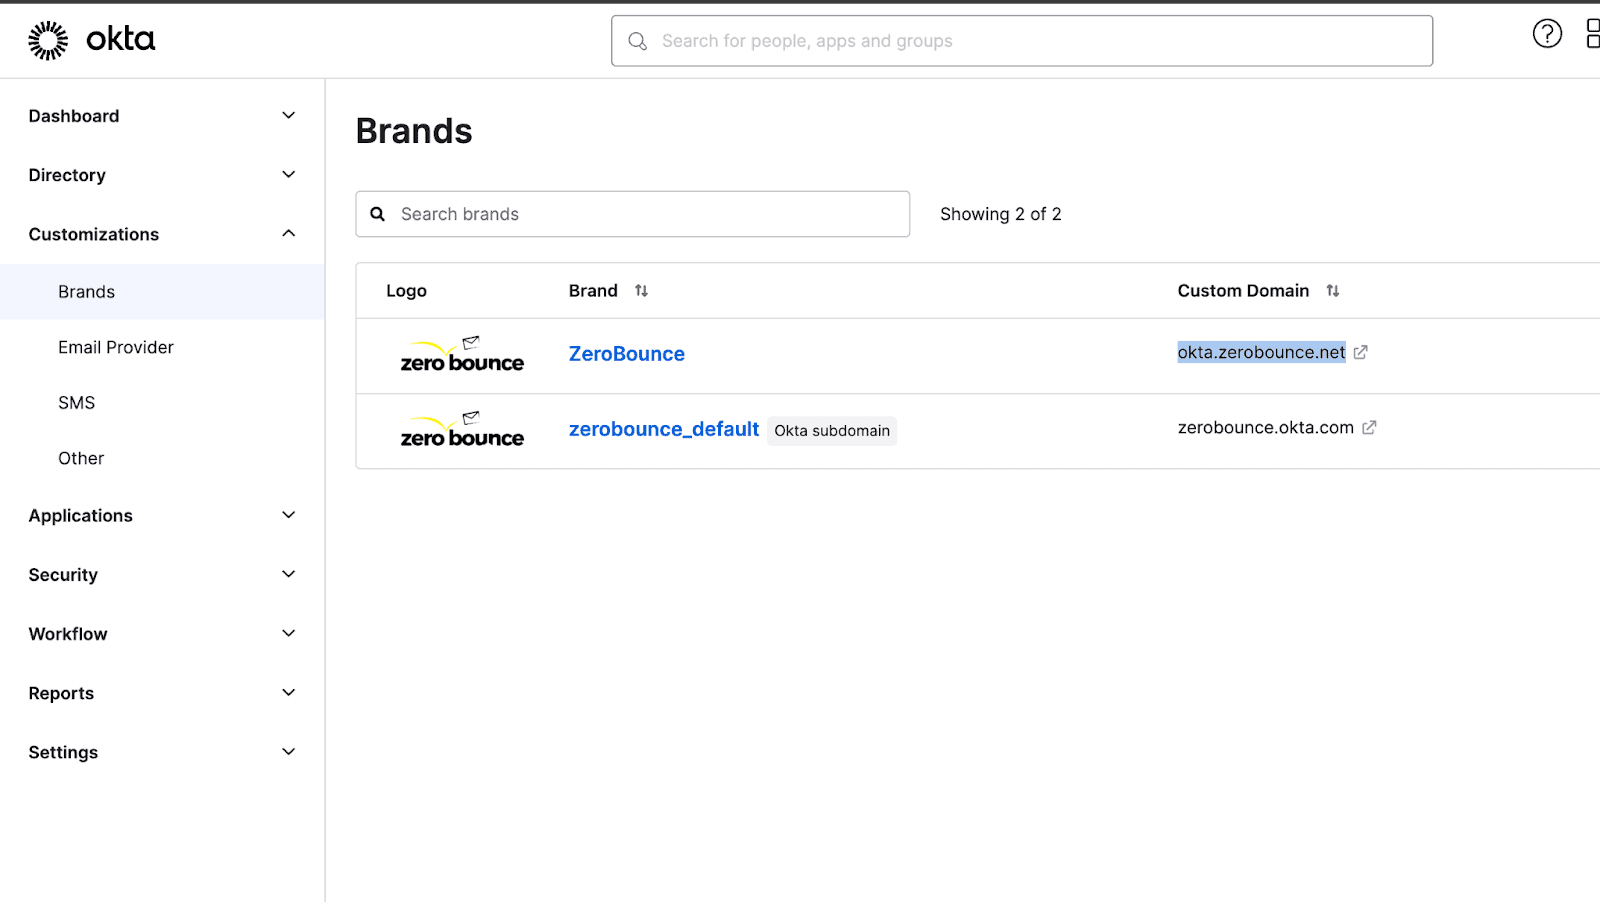
The Brands menu in Okta's Customizations shows the custom domain URLs for ZeroBounce and zerobounce_default
Configure Azure SSO
To configure a custom SSO solution for use with ZeroBounce, please contact ZeroBounce Support.
How to set up Azure AD to utilize the same user via single sign-on (SSO) in ZeroBounce
1. Create an Azure AD app using these instructions.
Or
Browse to Identity > Applications -> App Registrations and select New Registration Enter a Name and click register
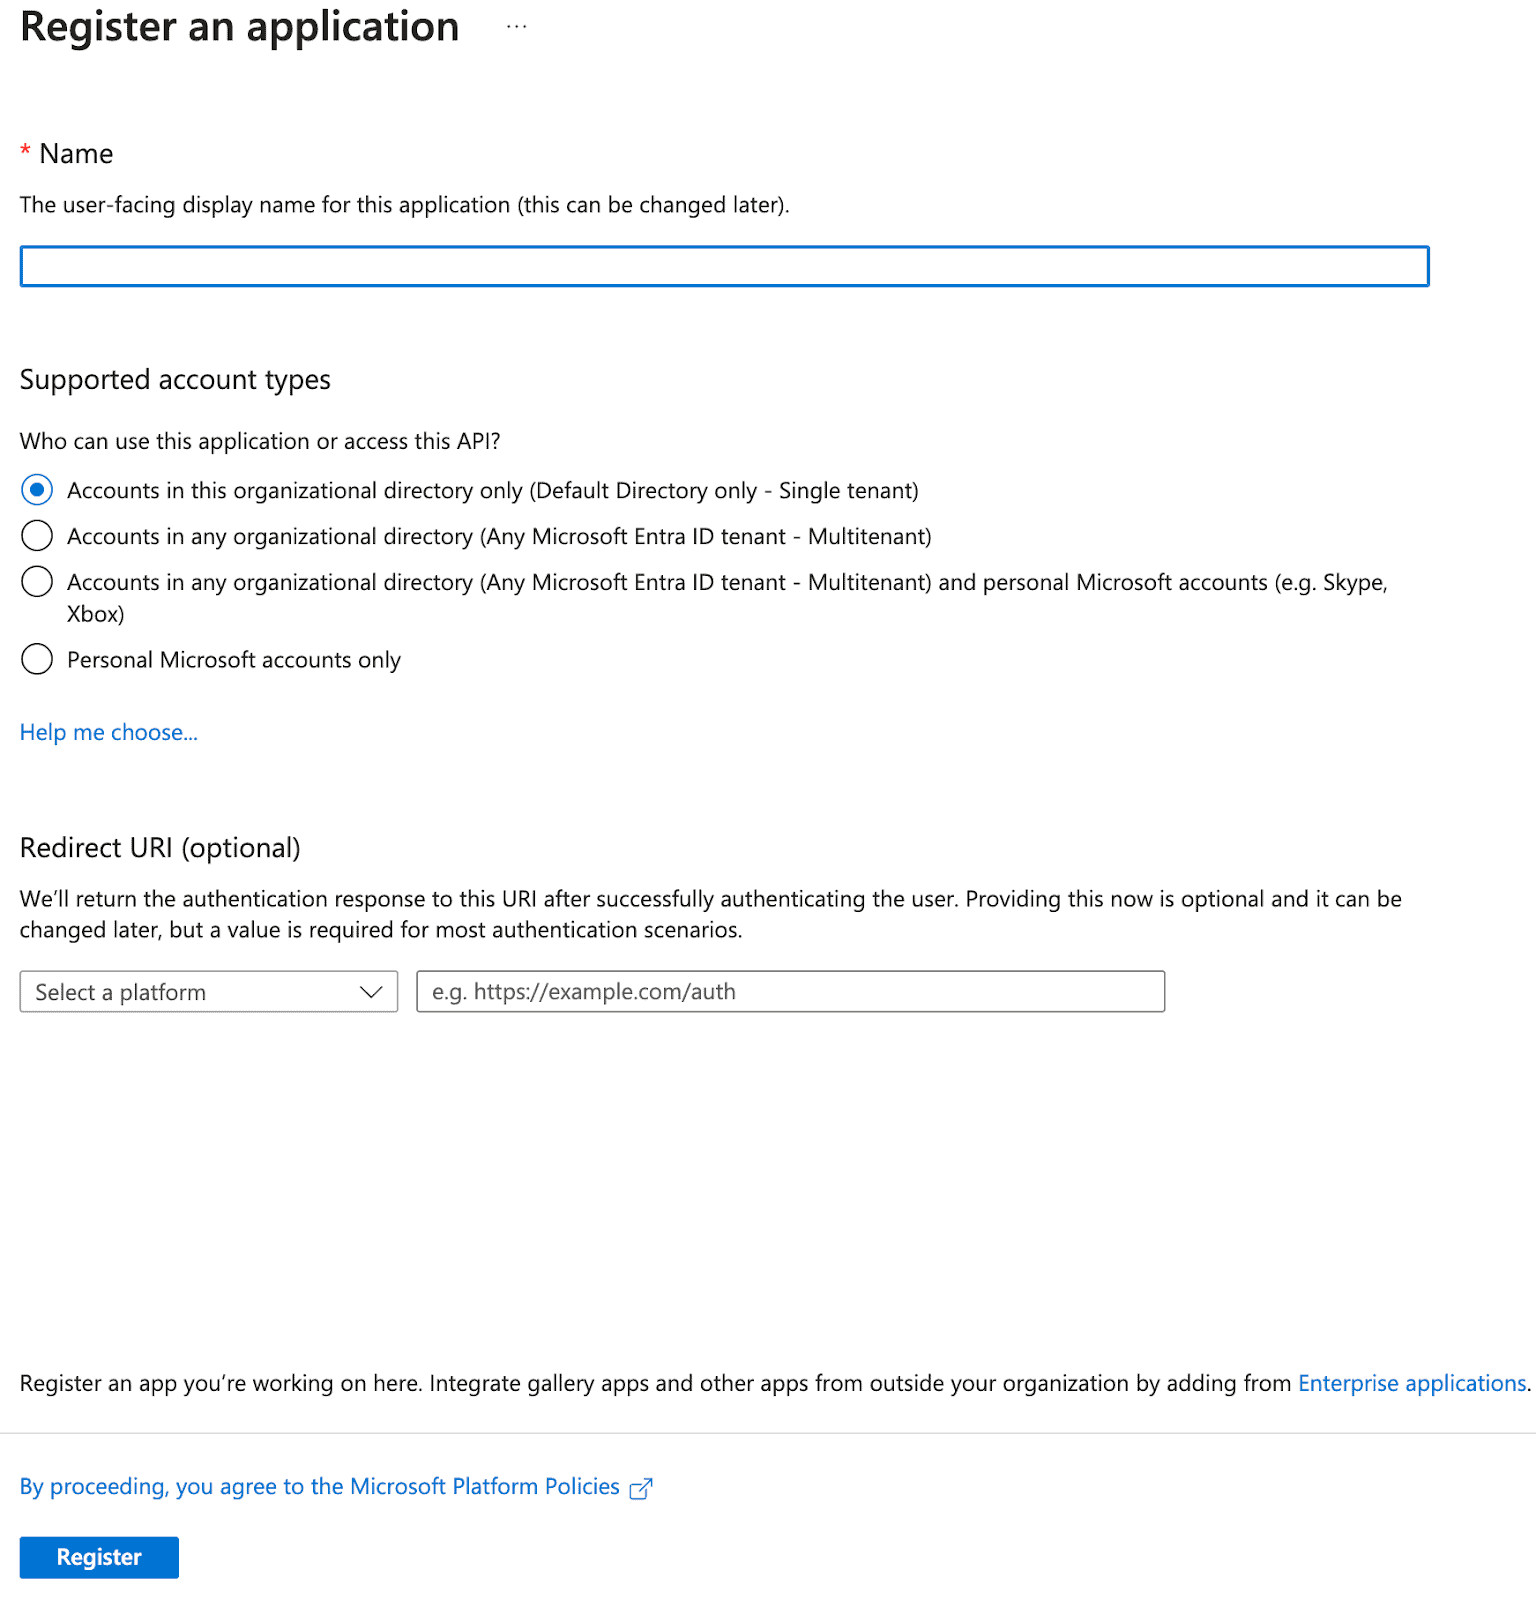
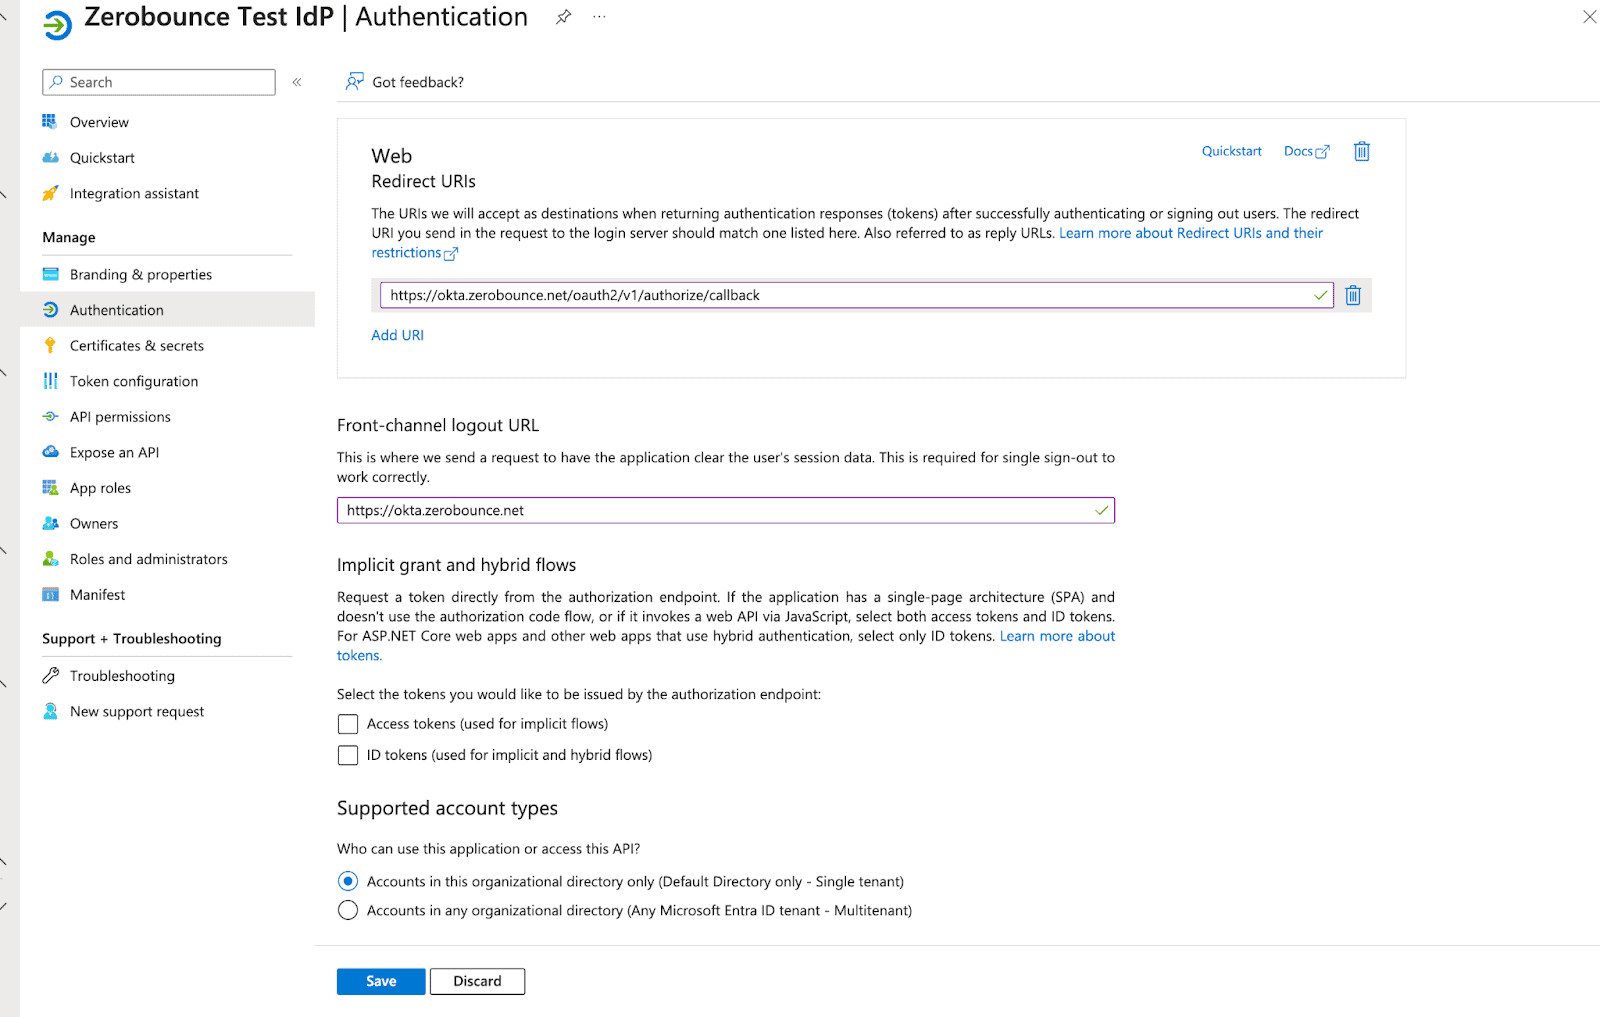
2. On the newly created application, under Manage, select Authentication and under Platform Configuration select Add Platform and choose Web as the application

In the Web platform created, add https://okta.zerobounce.net/oauth2/v1/authorize/callback as the redirect URI. In the Front-channel logout URL field, add the following: https://okta.zerobounce.net
3. Under Manage, select Certificates & Secrets and select New Secret
Set a Name and choose an expiry date
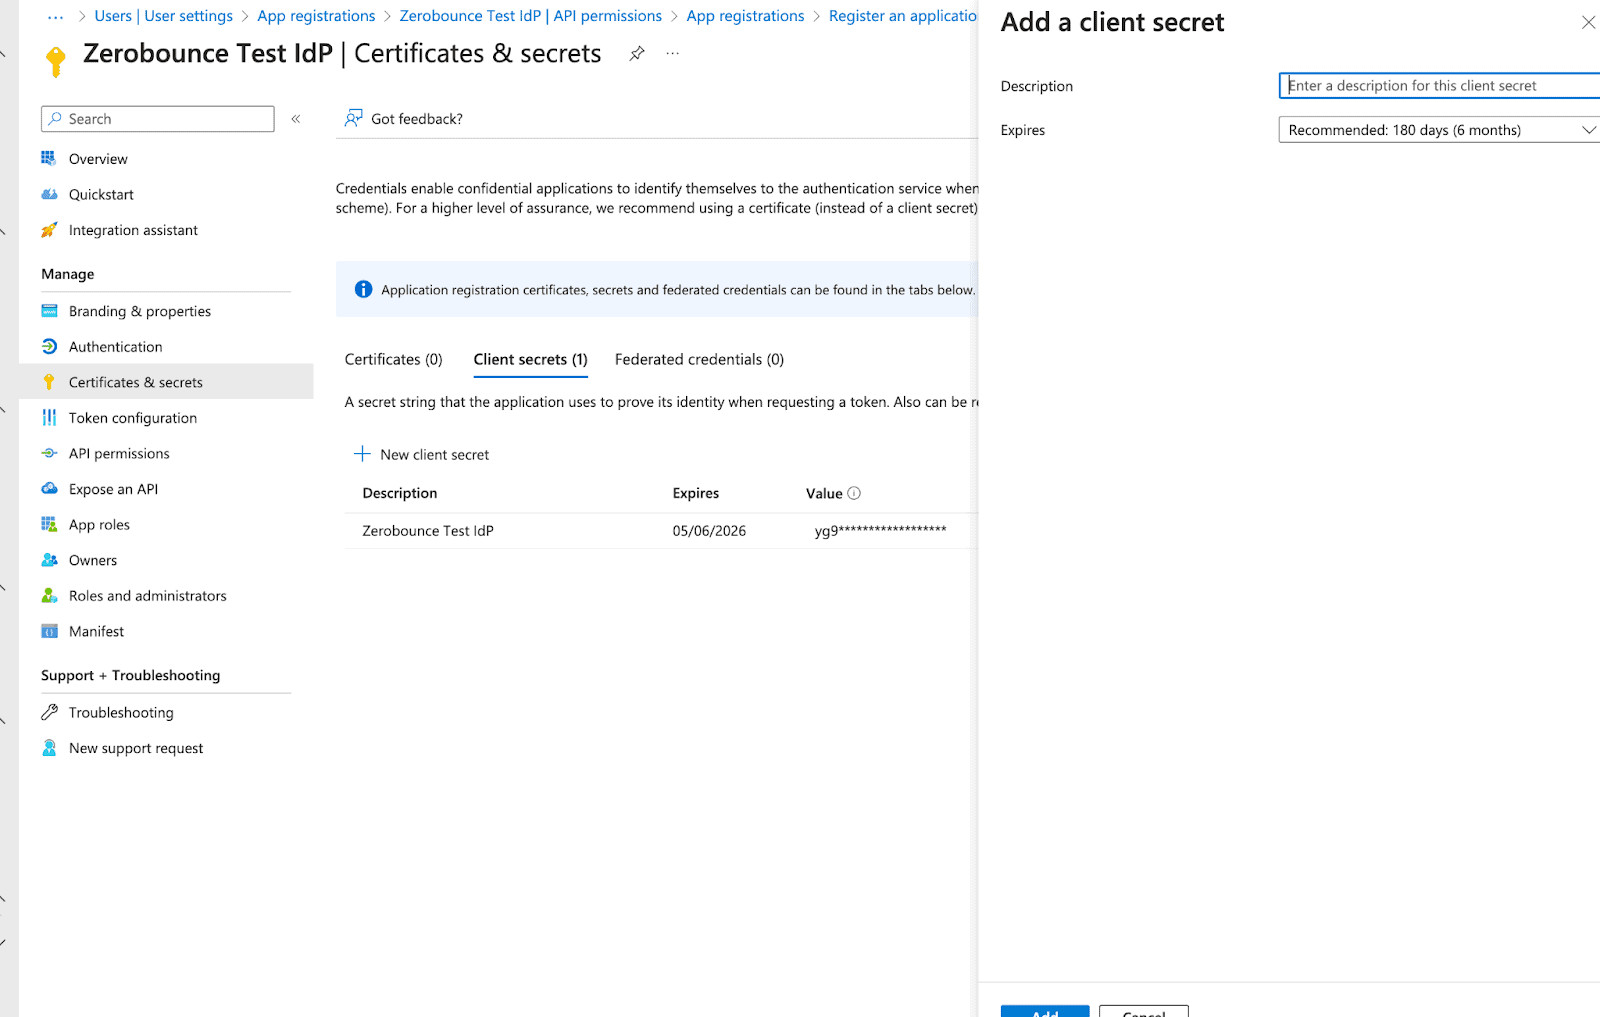
Copy the Value field as this will be required
What you will need to provide
1. The domain name you will be accessing this IdP from (or domain names in case of multi tenant configurations)
2. Application Id found in Overview
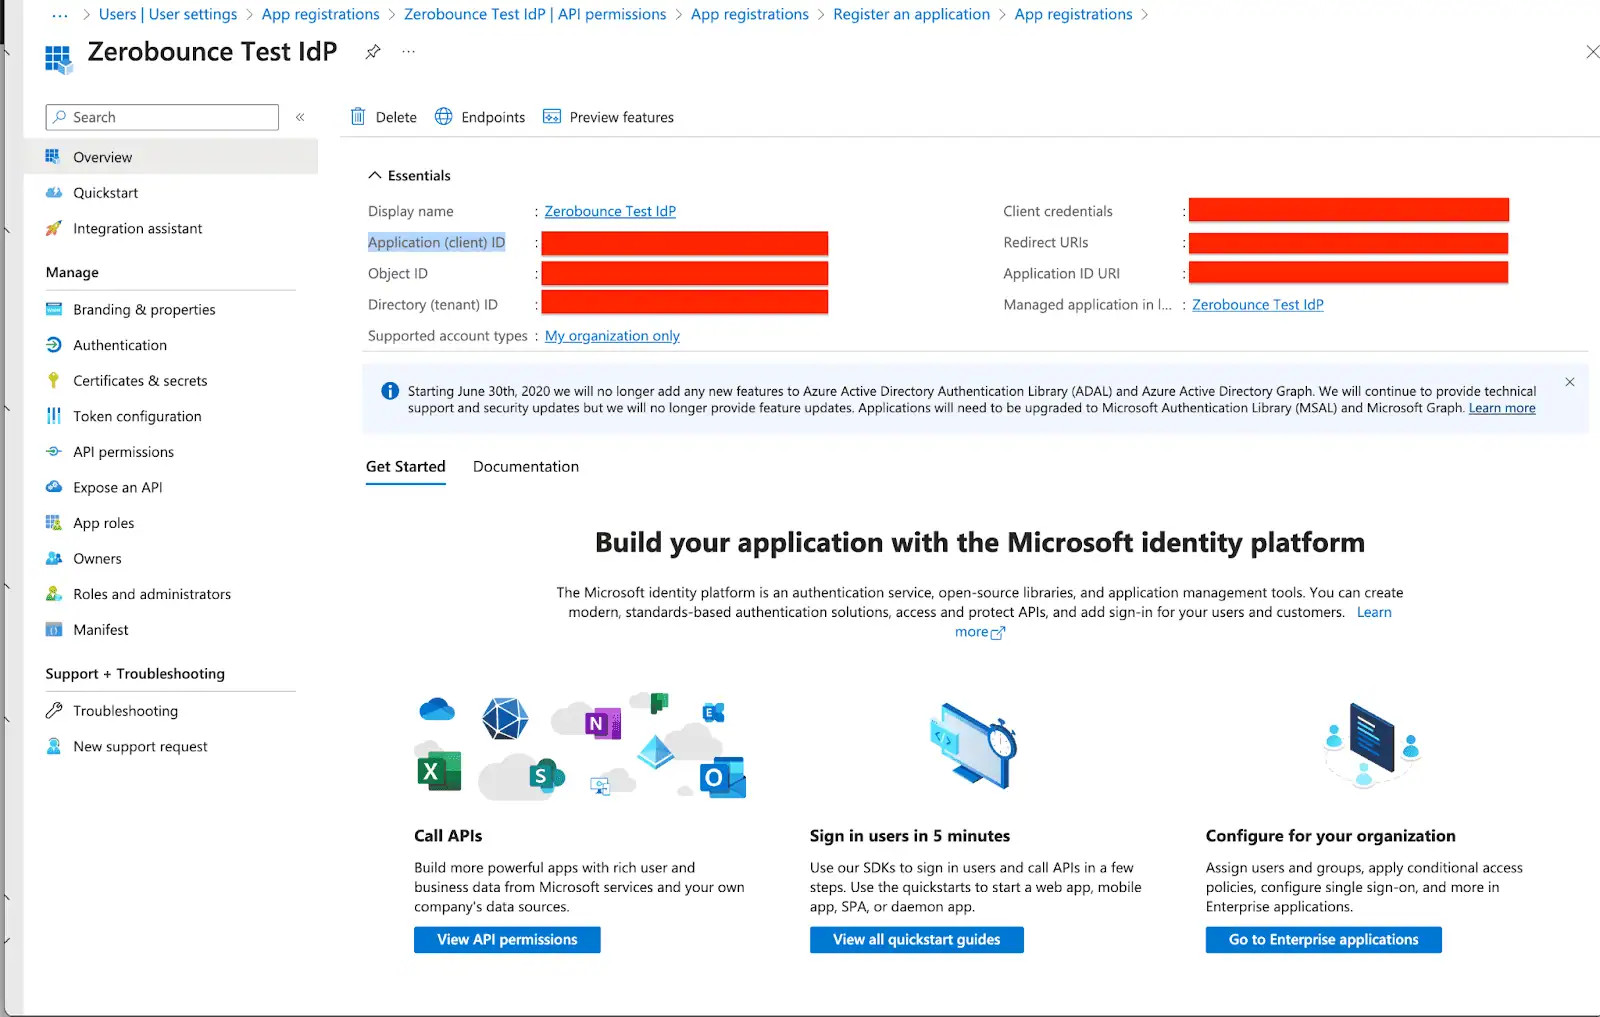
3. The link to .well-known/openid-configuration found in Overview -> Endpoints
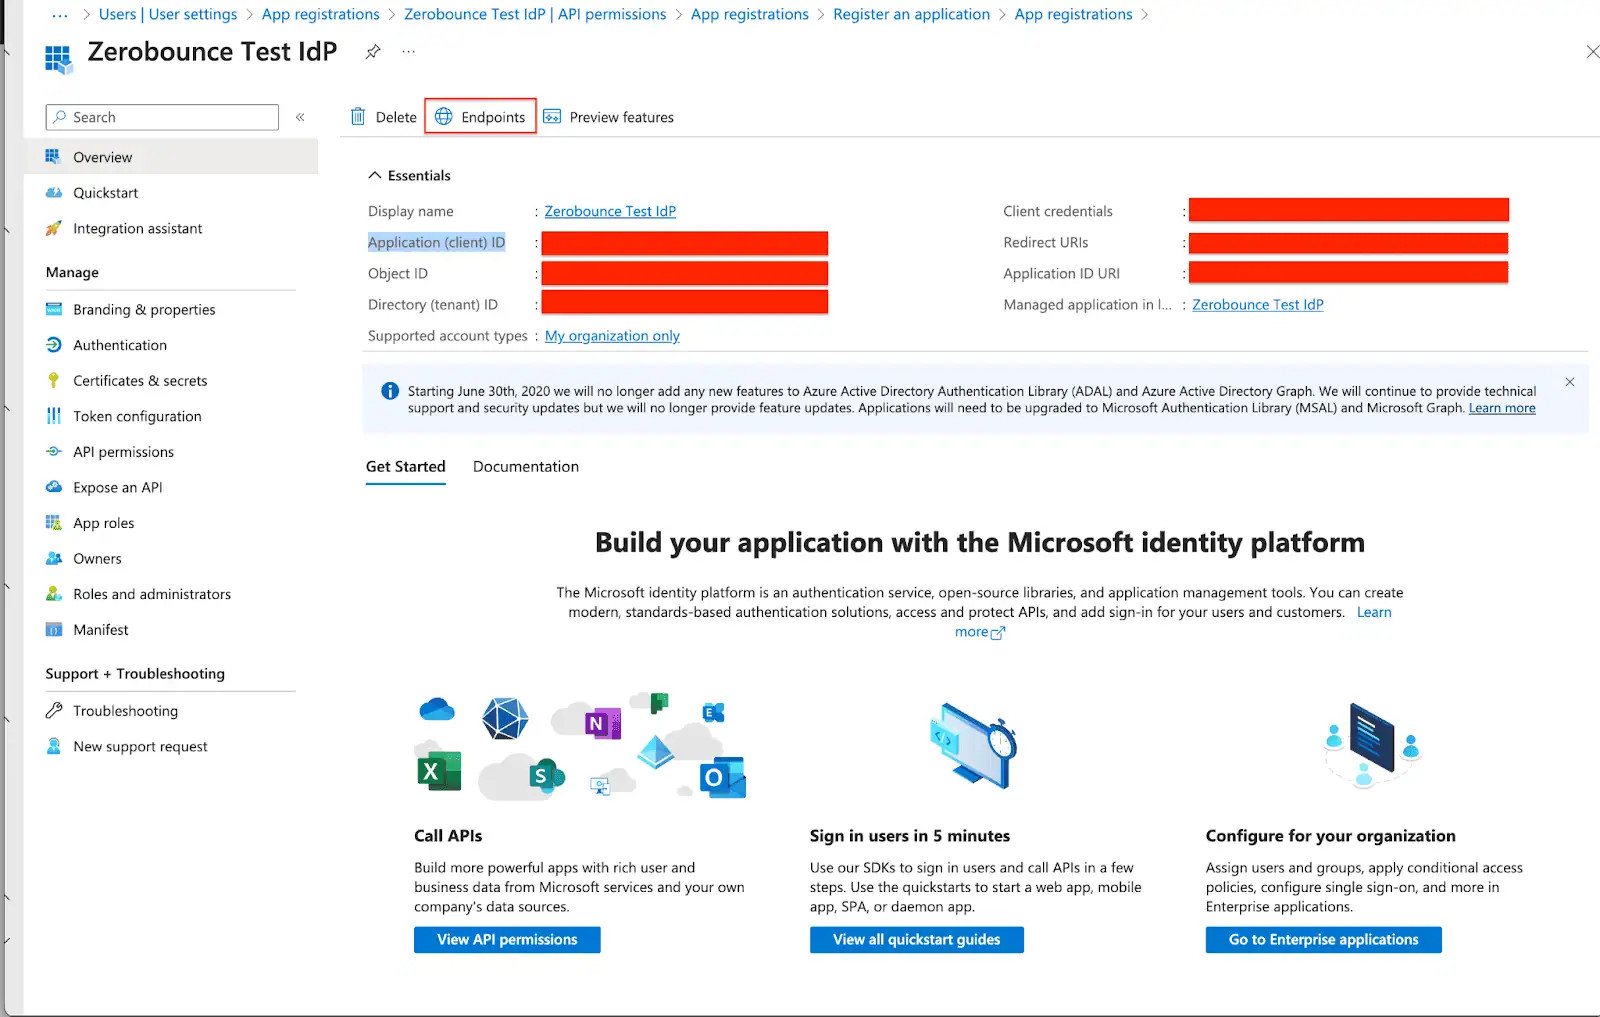
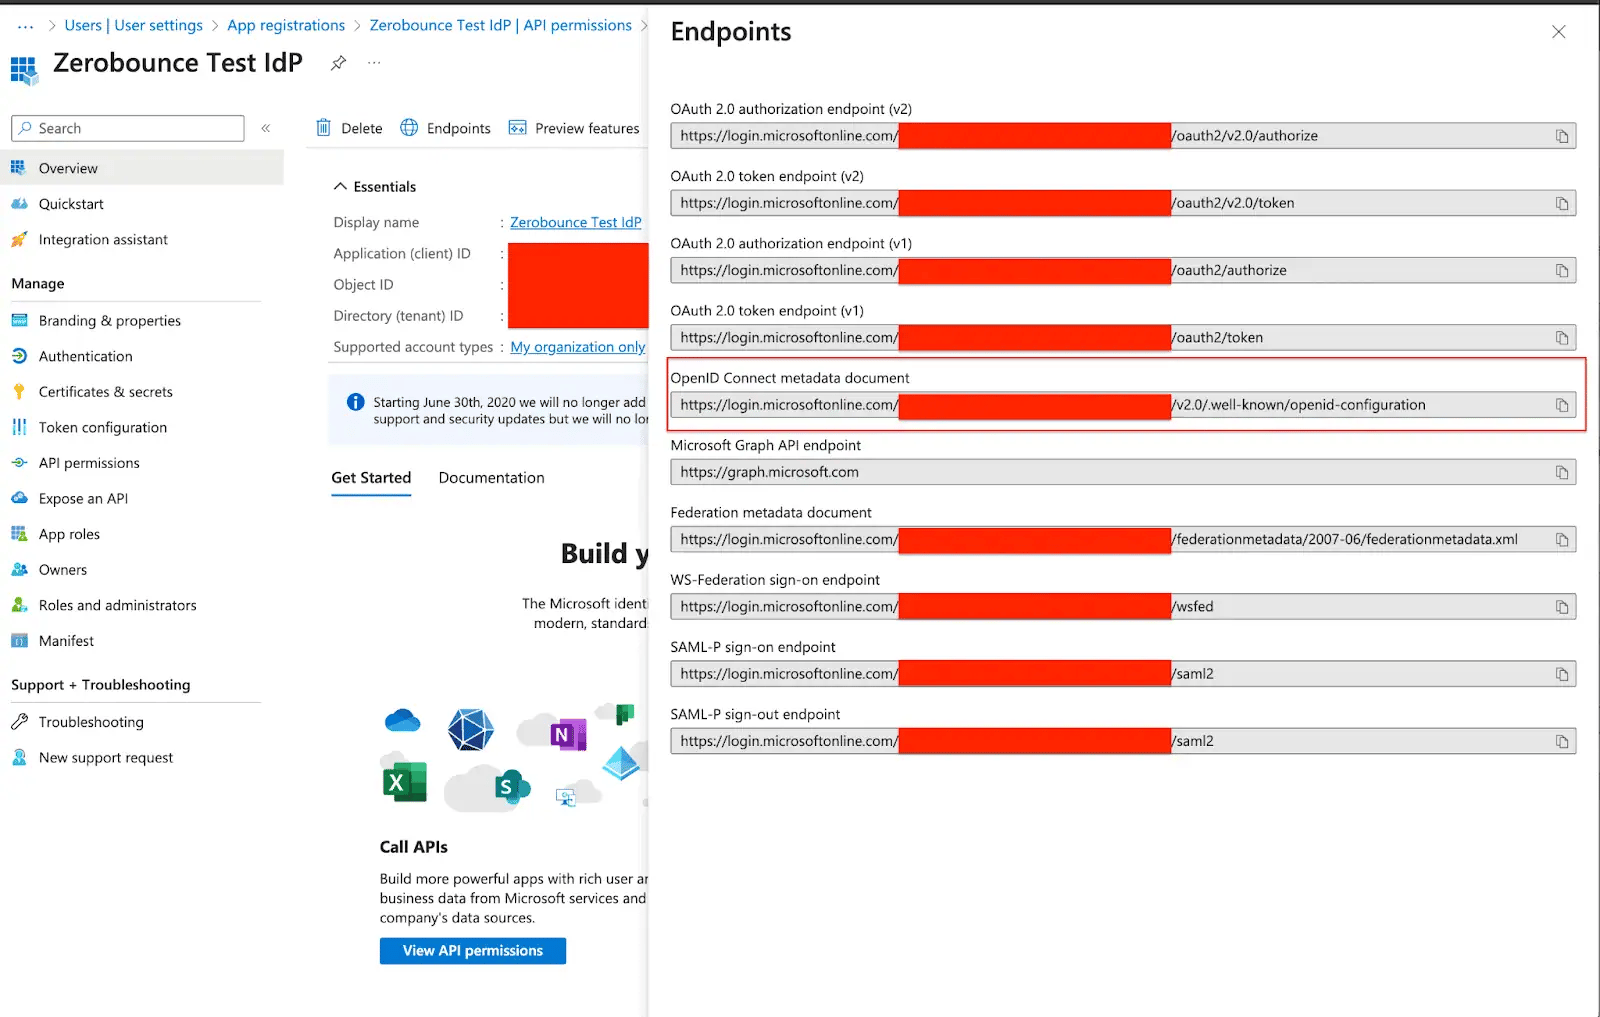
4. The client secret copied in the Certificates & Secrets configuration
For more information on the steps please see these instructions.
Configure OpenID SSO
At the OpenID ConnectIdP, create the client application that you want to use for authenticating and authorizing your users.Use the Identity Provider's documentation to create a client application.
Add authorization server as https://zerobounce.okta.com/oauth2/v1/authorize
Add redirect uri as https://zerobounce.okta.com/oauth2/v1/authorize/callback.
Provide client id, client secret and endpoints for IDP Issuer, Authorization, Token and JWKS