
Docs
Docs
The ZeroBounce Klaviyo Form integration adds real-time email validationⓘ to Klaviyo onsite sign-up forms (embedded, popup, flyout, and full-page).
This page covers the Klaviyo Form widget. For cleaning and scoring existing Klaviyo lists, see the official Klaviyo Integration documentation.
Prerequisites
You must have an active Klaviyo account and an active ZeroBounce account.
If you do not have access to the mentioned accounts, you can create them using the following links:
Once you have access to Klaviyo and ZeroBounce, proceed with the following steps:
Step 1
Go to https://www.zerobounce.net/members/signin and sign in with your ZeroBounce account. Then, go to the left menu, open Email Validation, and click Integrations.
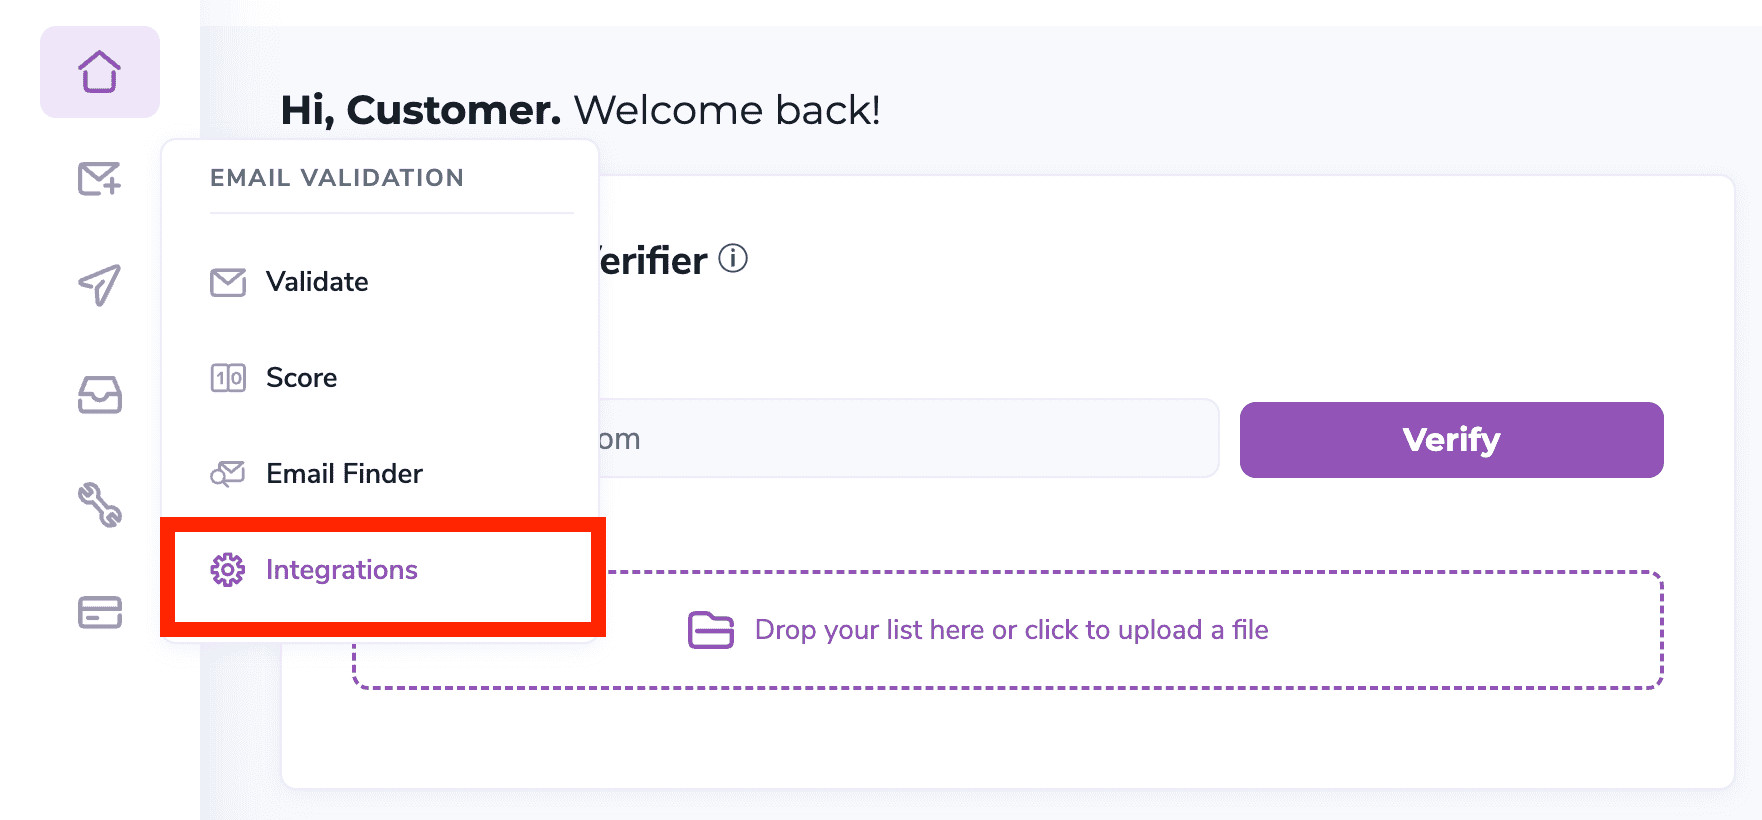
The ZeroBounce members dashboard with a red square highlighting the Integrations tab.
Step 2
On the Integrations page, select Klaviyo Form from the integration list. You can find it under the Form Builder category.
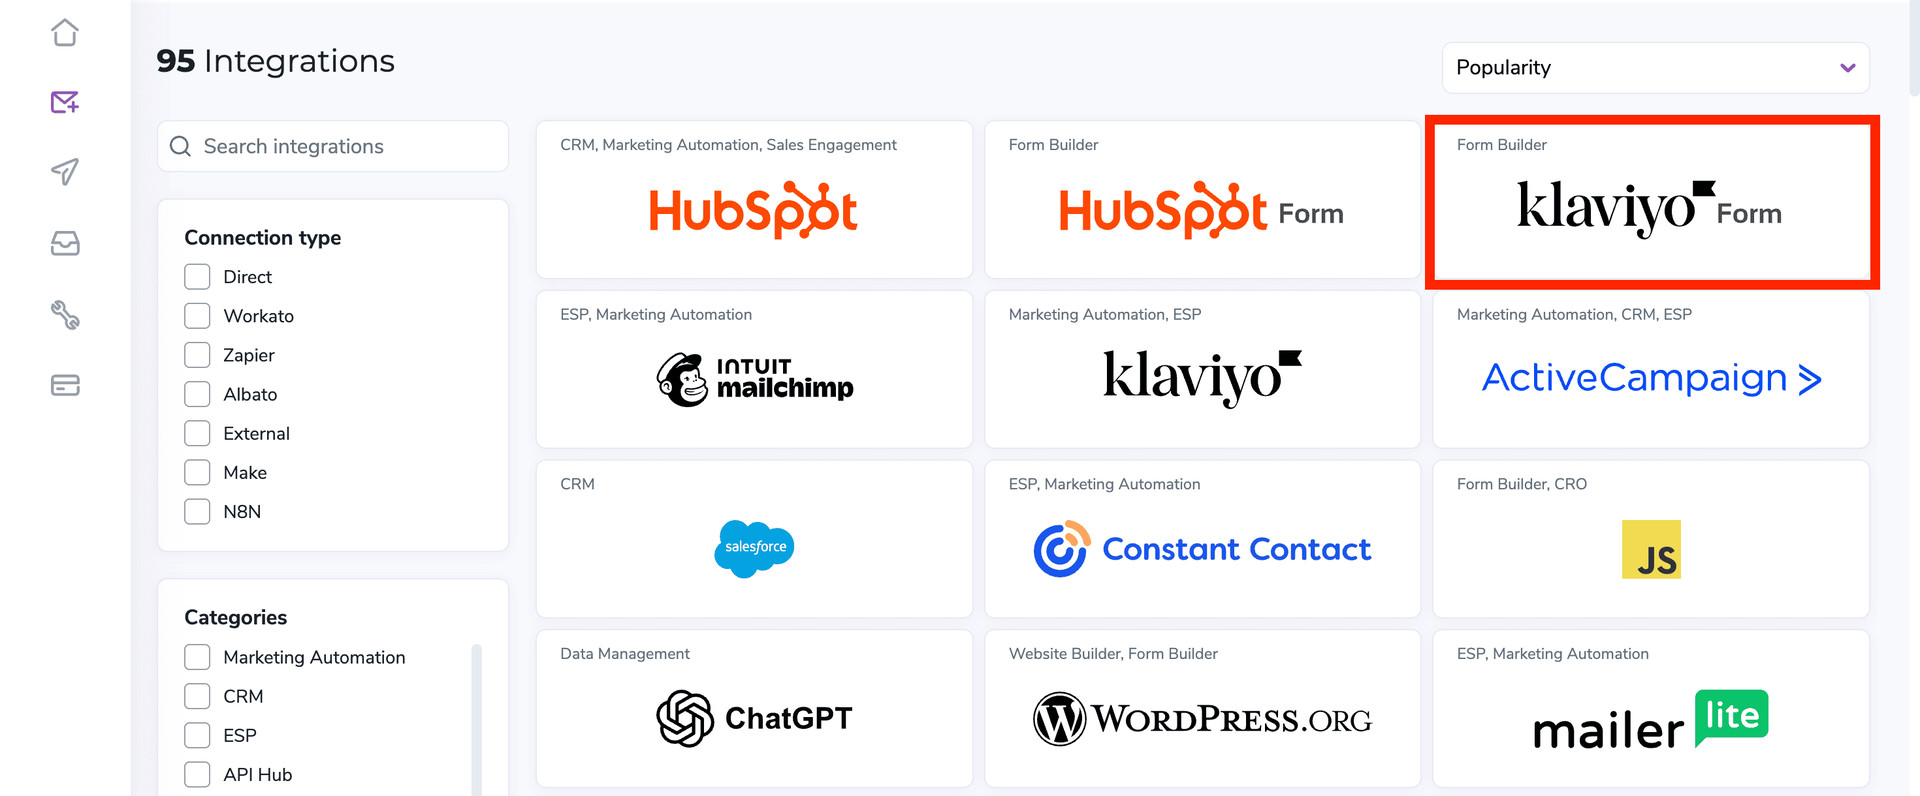
The list of ZeroBounce integrations with Klaviyo Form highlighted.
Step 3
A Redirect to Klaviyo Form modal appears. This step sends you to Klaviyo’s authentication site. After you authenticate, you are redirected back to ZeroBounce.
Click Connect to continue.
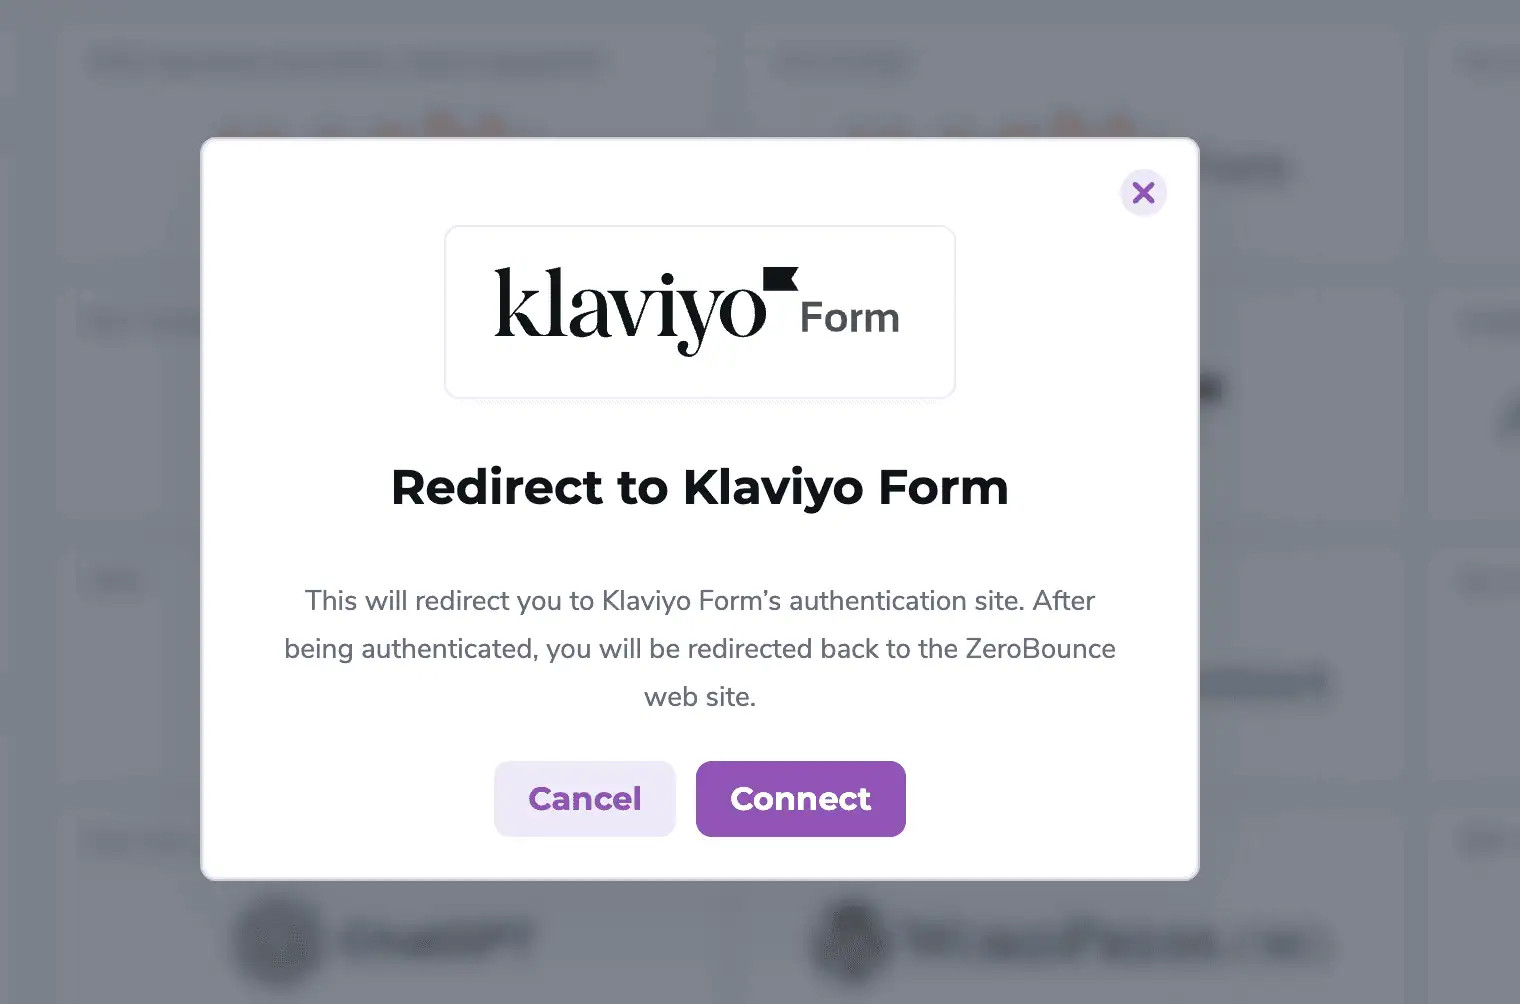
The ZeroBounce redirect modal for the Klaviyo Form integration.
Step 4
Klaviyo may show a standard screen stating that the ZeroBounce Forms app has not been reviewed by Klaviyo’s partner team. This is expected, because it is a new integration.
You can continue the setup by clicking Continue — it is entirely secure.
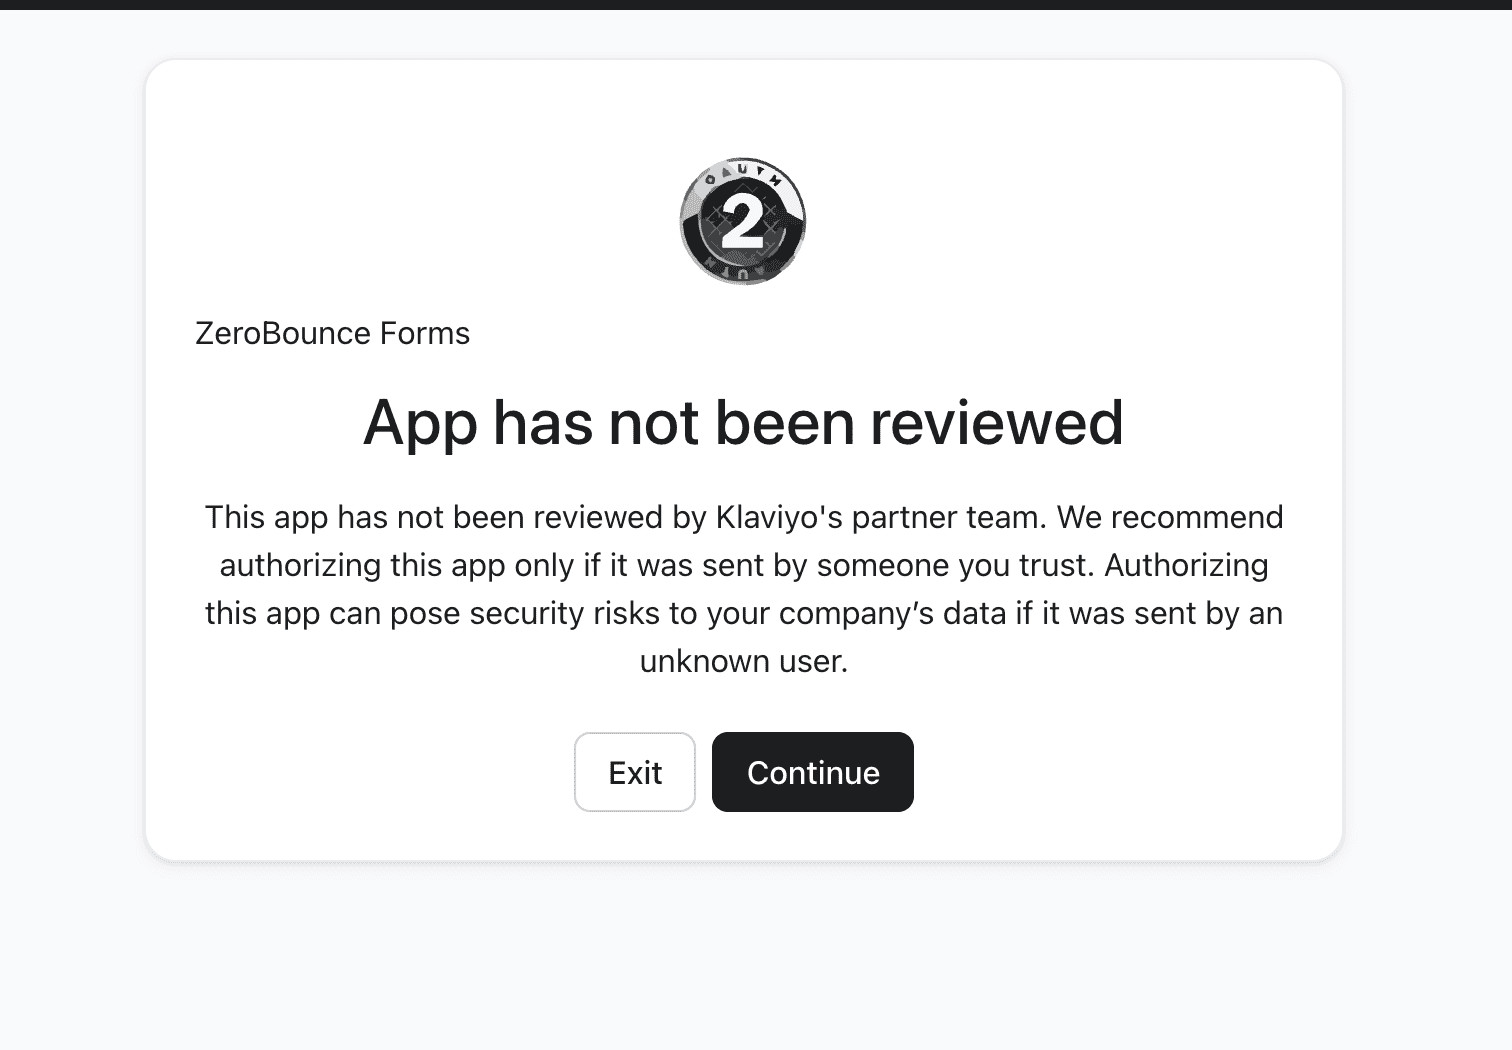
Klaviyo’s authorization warning for the ZeroBounce Forms app.
Step 5
On the next screen, Klaviyo asks you to allow ZeroBounce Forms to access your account’s information. The requested permission is Accounts — View account details.
Click Allow to complete the connection. You can remove access later from the integration settings in Klaviyo.
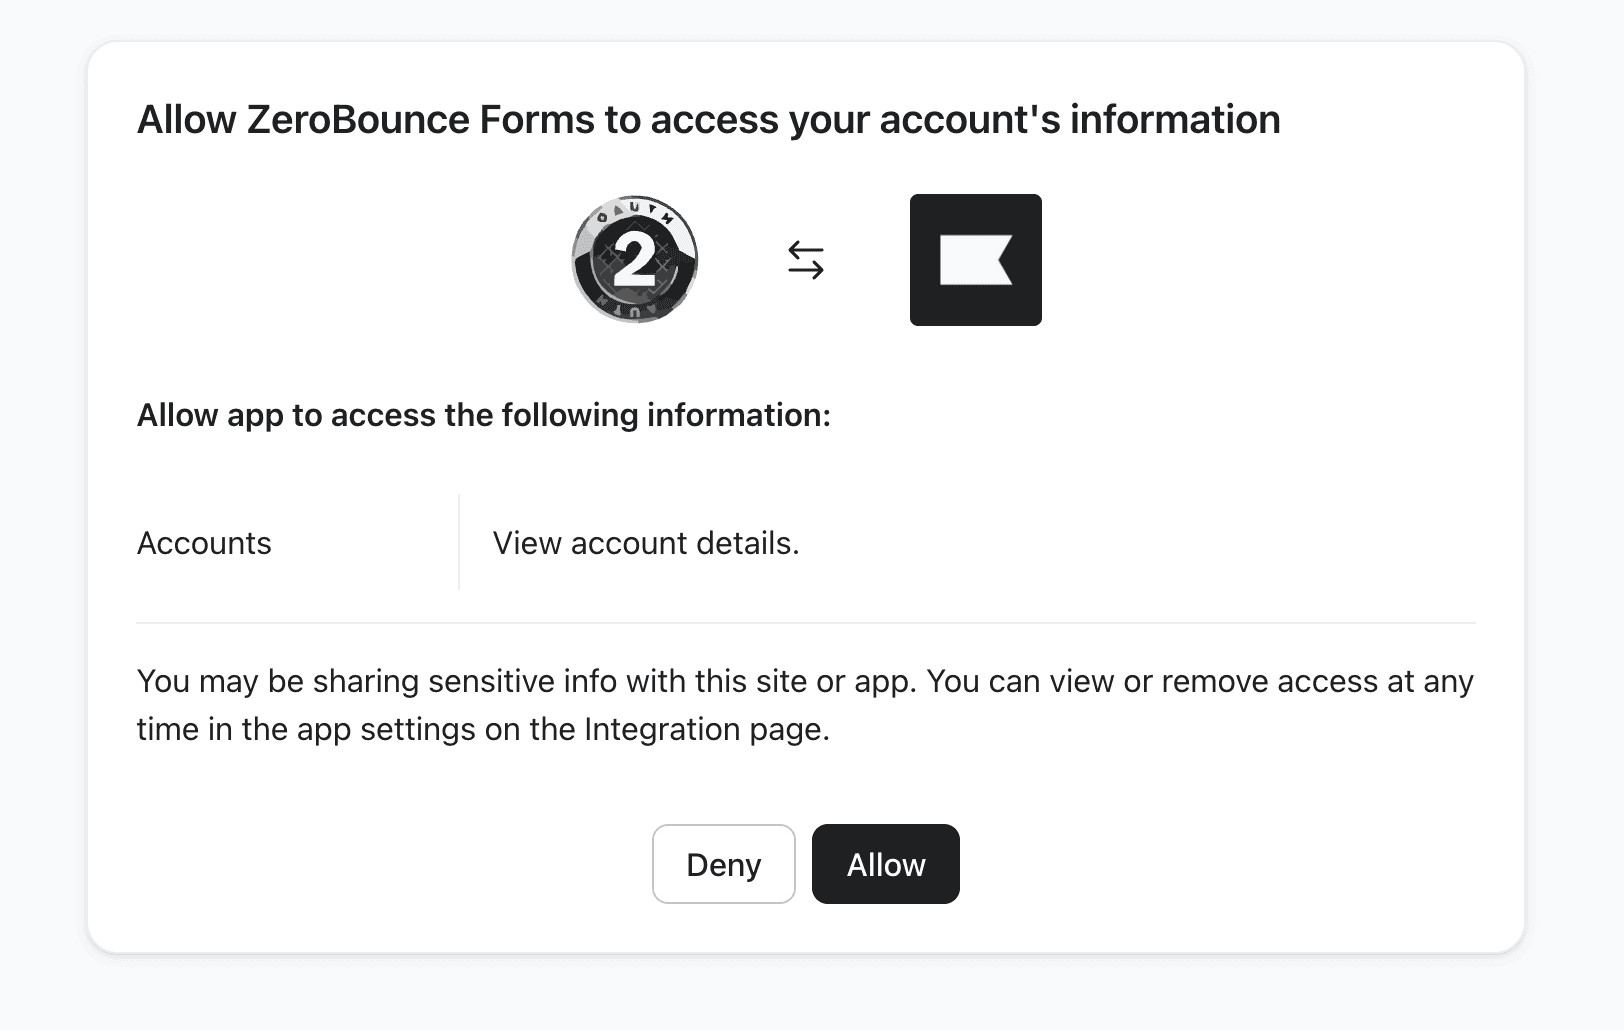
The Klaviyo permission screen for ZeroBounce Forms.
Step 6
After you click Allow, Klaviyo redirects you back to ZeroBounce. You land on the Klaviyo Form integration, which has three views: Dashboard, Settings, and Logs. Use the Connected integrations dropdown at the top to switch between installs, or click + New Integration to connect another Klaviyo account.
The Dashboard view shows the connection status from Klaviyo.
Click Disconnect to remove the connection. OAuth alone does not validate emails on your forms; you still need to add the widget snippet (see Install below).
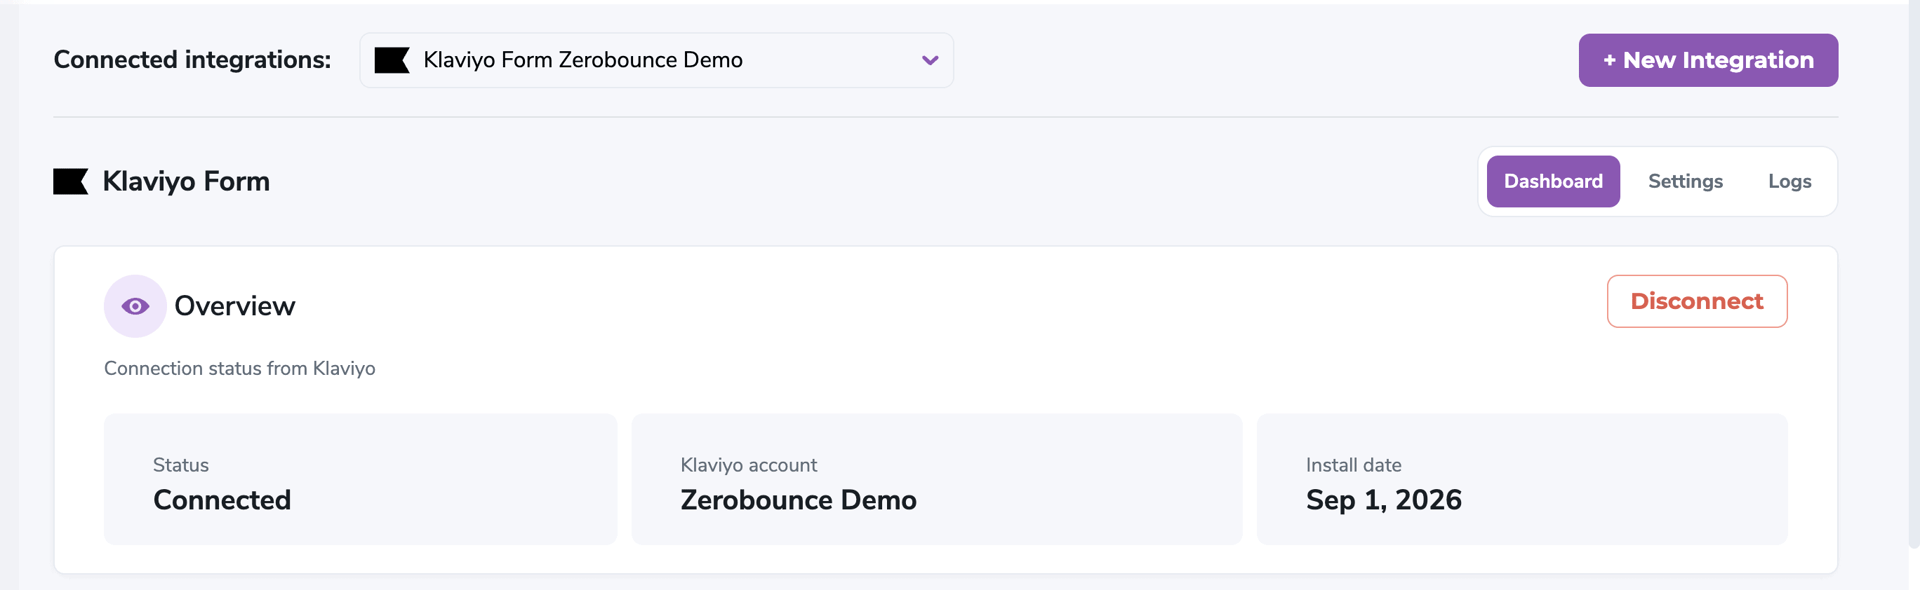
The Klaviyo Form Dashboard overview with connection status.
On the Dashboard, the Install section explains how to add the ZeroBounce widget to your website.
OAuth install is not enough. Visitors only get validation when both klaviyo.js and the ZeroBounce widget script are present on the same pages as your Klaviyo forms.
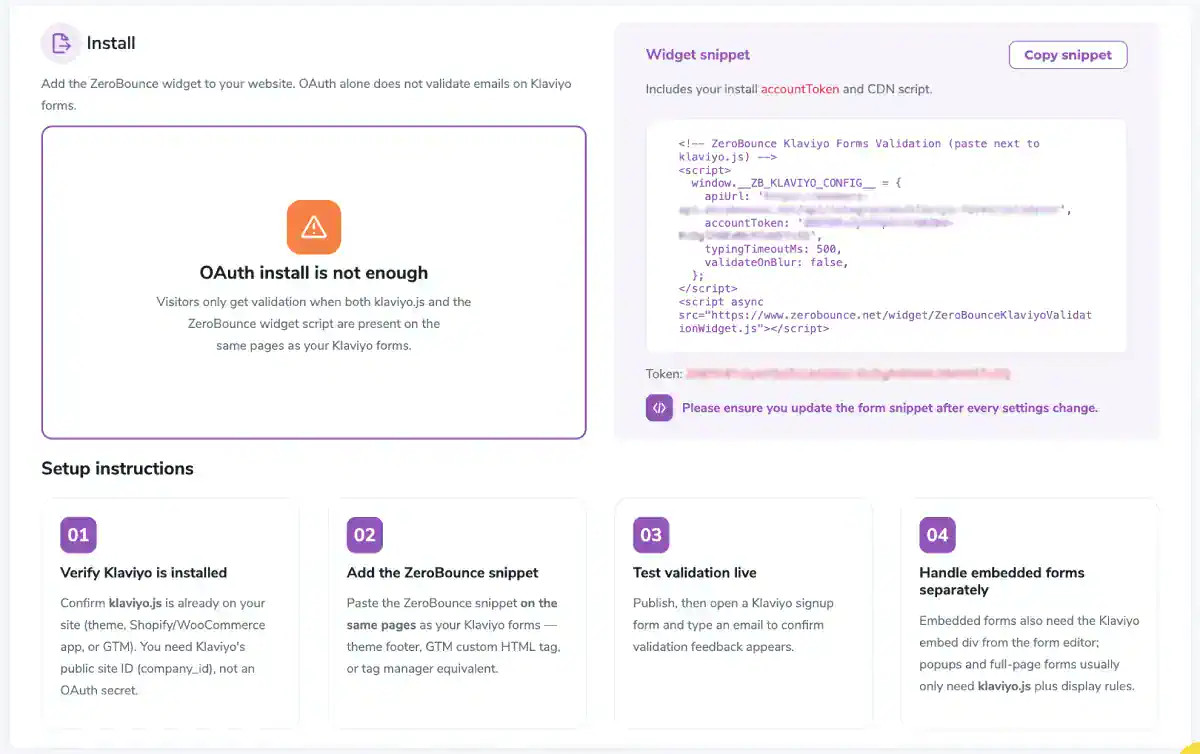
The Install section with the widget snippet and setup steps.
Widget snippet
Click Copy snippet. The snippet includes your install accountToken and the CDN script. Do not put your ZeroBounce API key in the browser.
The copied snippet looks like this (your apiUrl and accountToken are unique to this install):
The snippet values follow your Settings → Validation options. After you change those settings, copy the snippet again.
Setup Steps:
Open Settings (next to Dashboard and Logs). Settings has two tabs: Configuration and Forms. Click Save Changes after you edit either tab.
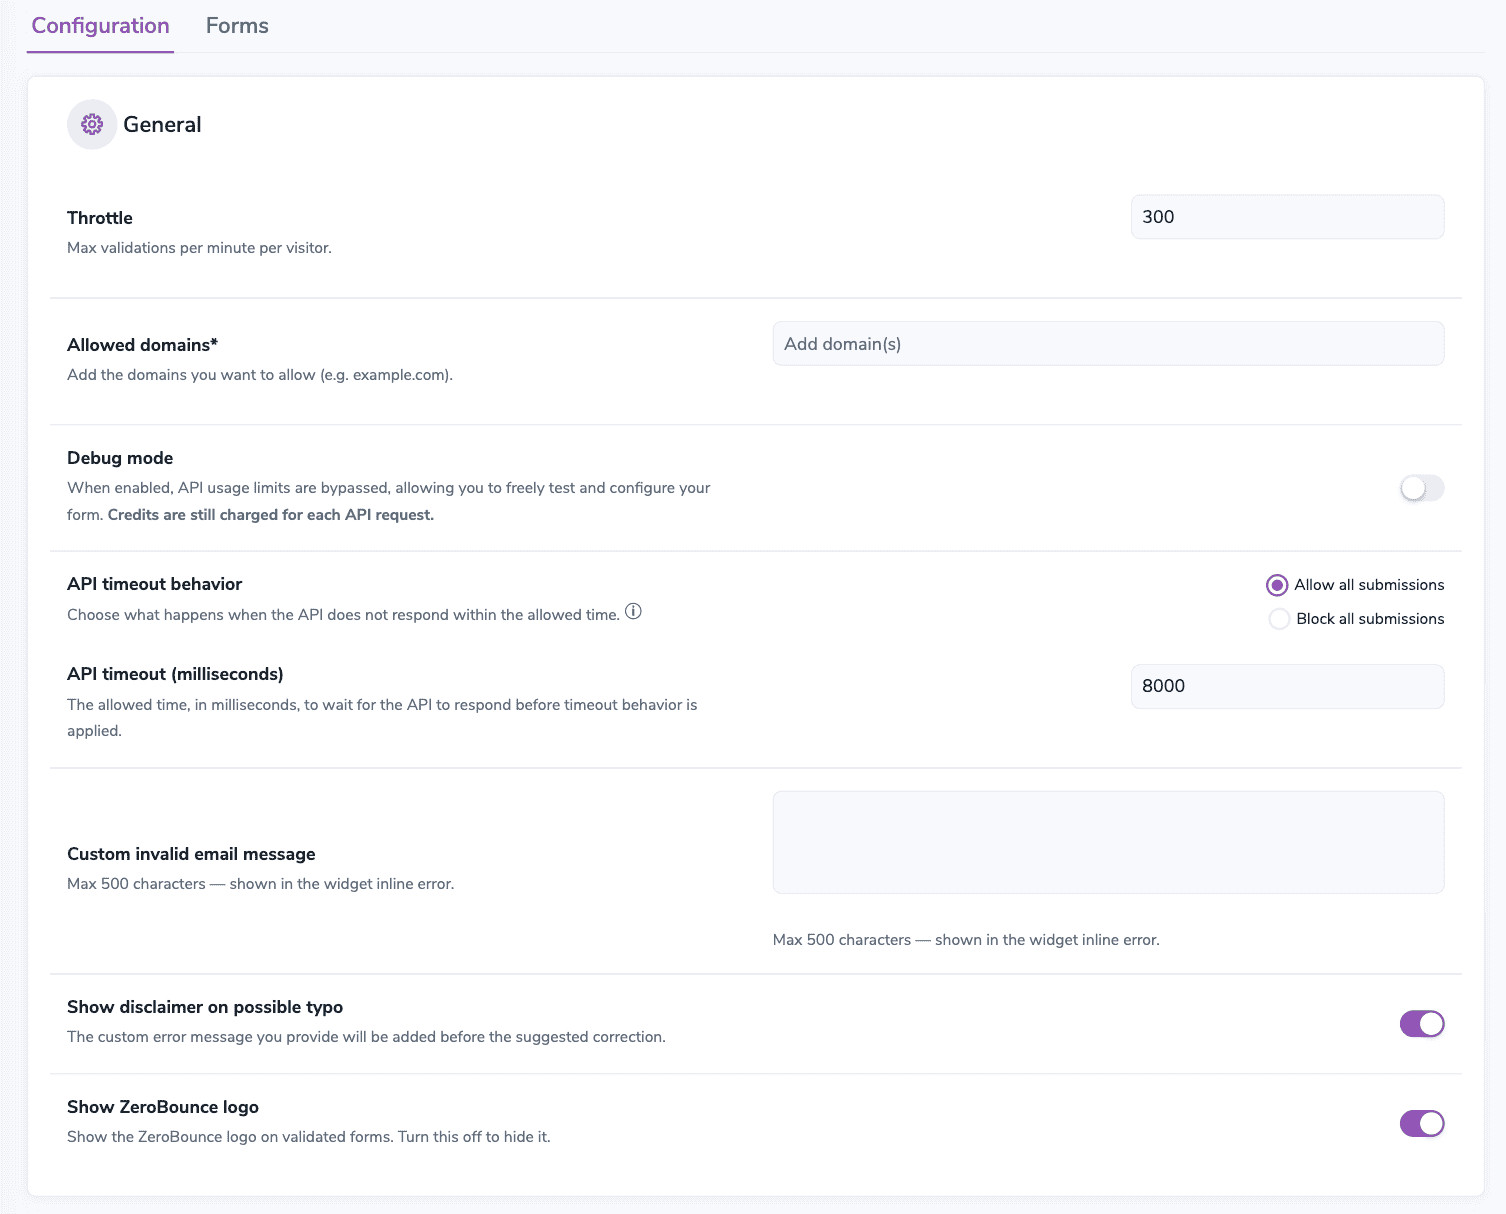
The Settings Configuration tab, General section.
Next to When to validate, choose how the widget triggers a validation: Validate on blur (default) or Validate after idle typing.
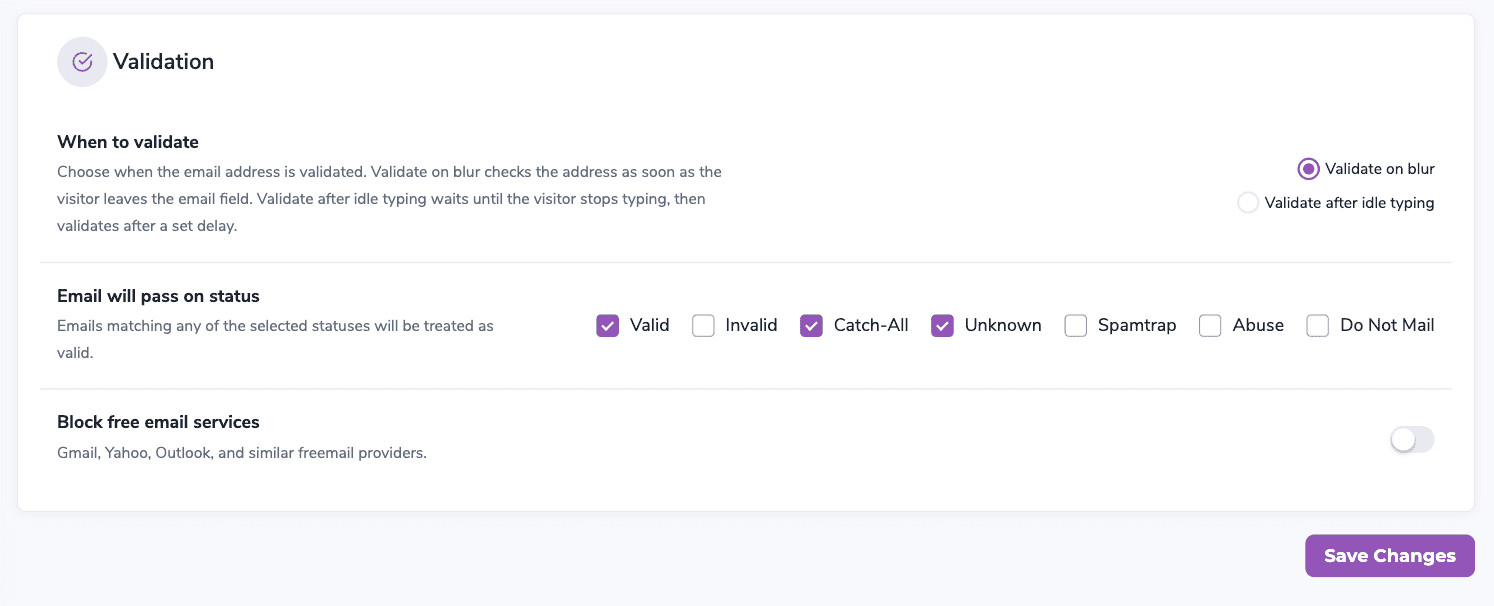
The Validation section with Validate on blur selected.
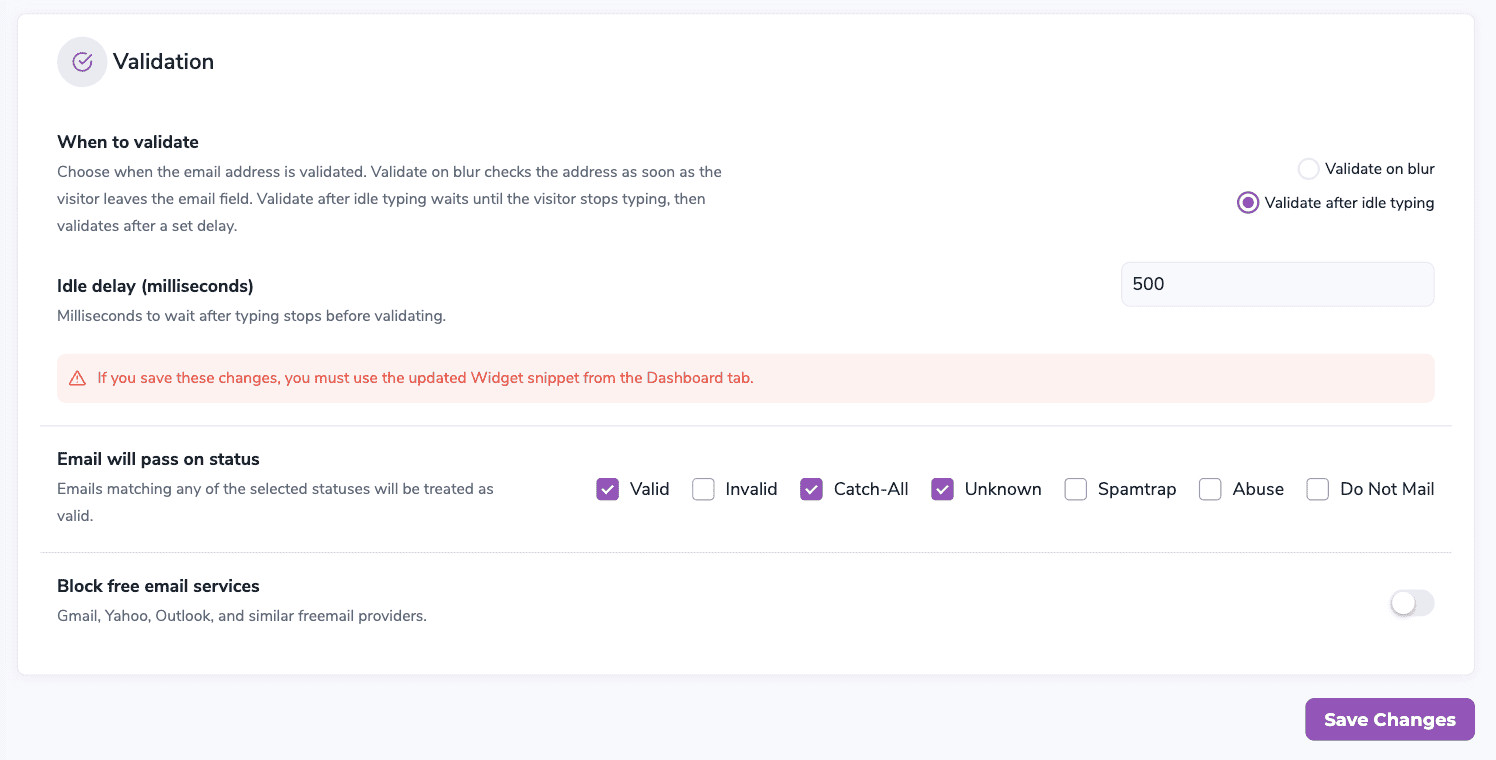
The Validation section with Validate after idle typing selected and the idle delay field.
If you save these changes, you must use the updated widget snippet from the Dashboard tab.
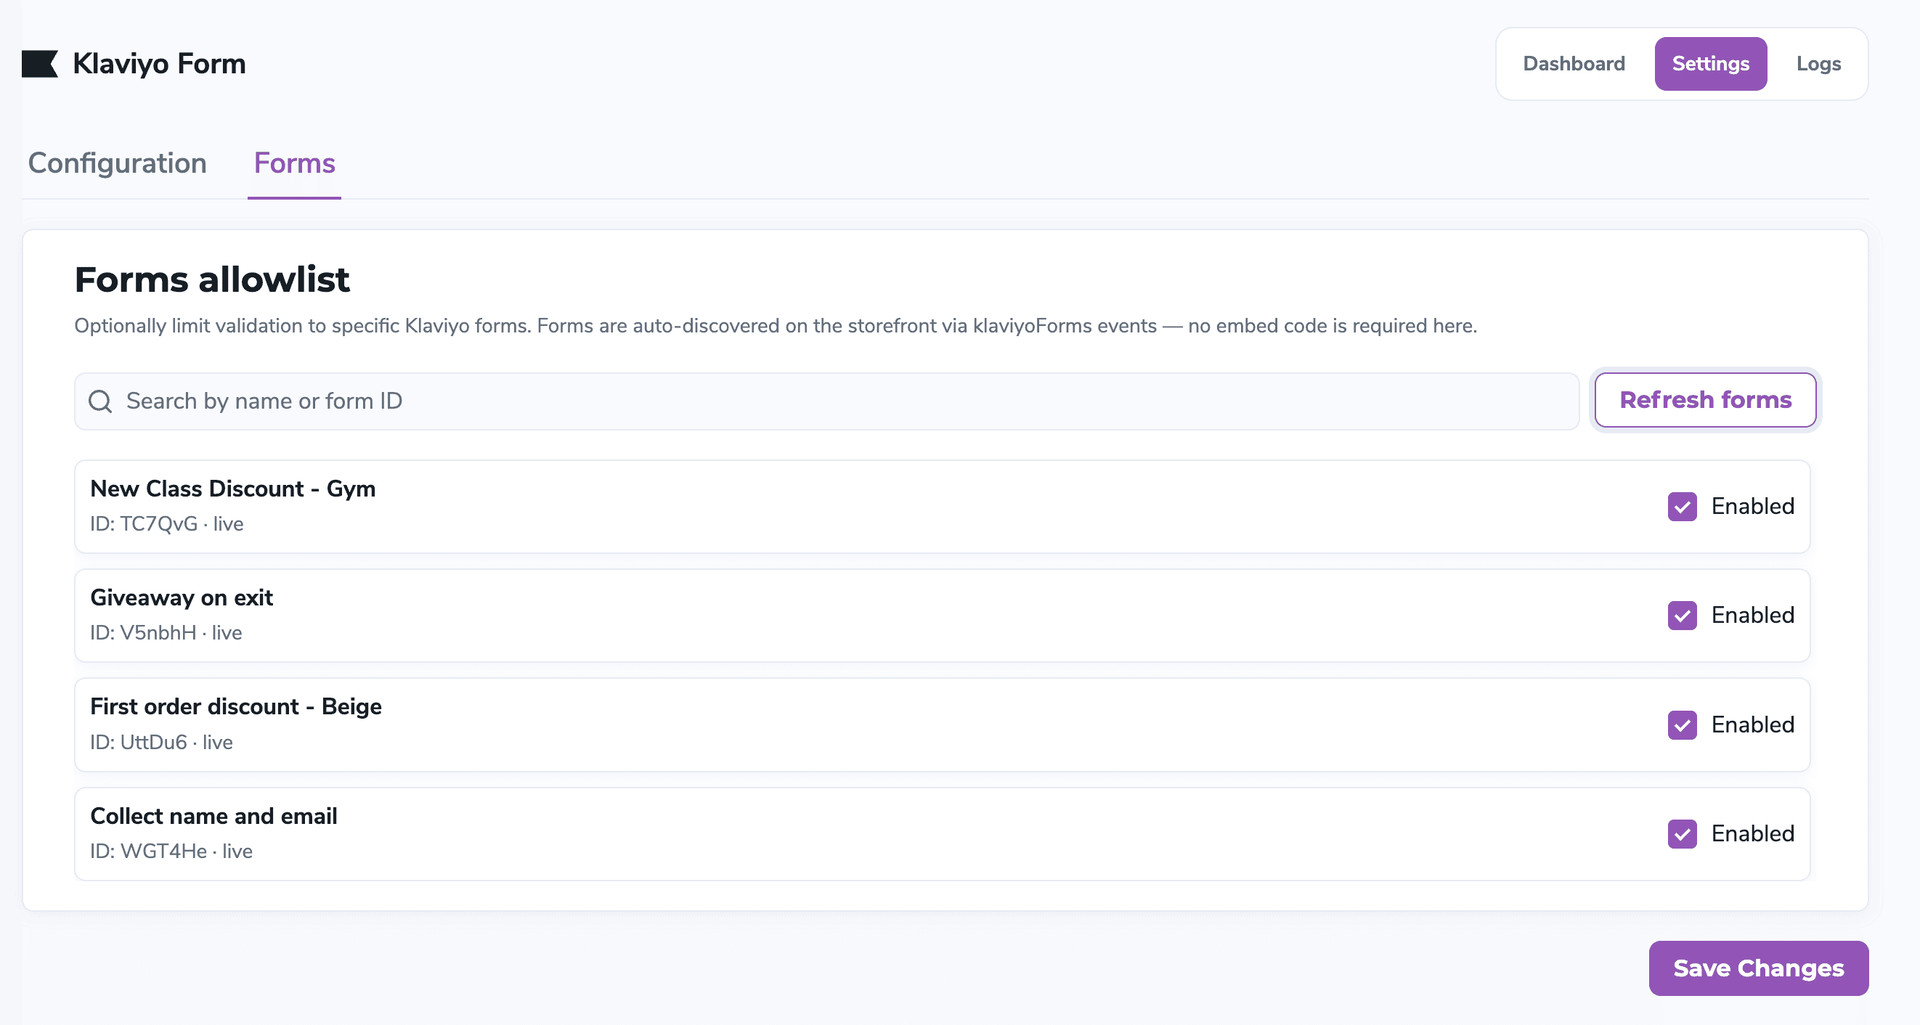
The Settings Forms tab with the forms allowlist.
The Forms tab is an optional allowlist. Forms are auto-discovered on the storefront via klaviyoForms events — no embed code is required here.
The Logs view shows validation activity returned by the ZeroBounce API: a monthly chart, a table of recent validations, and a details panel for each row.
The chart counts each validation status returned by the API for the current month.
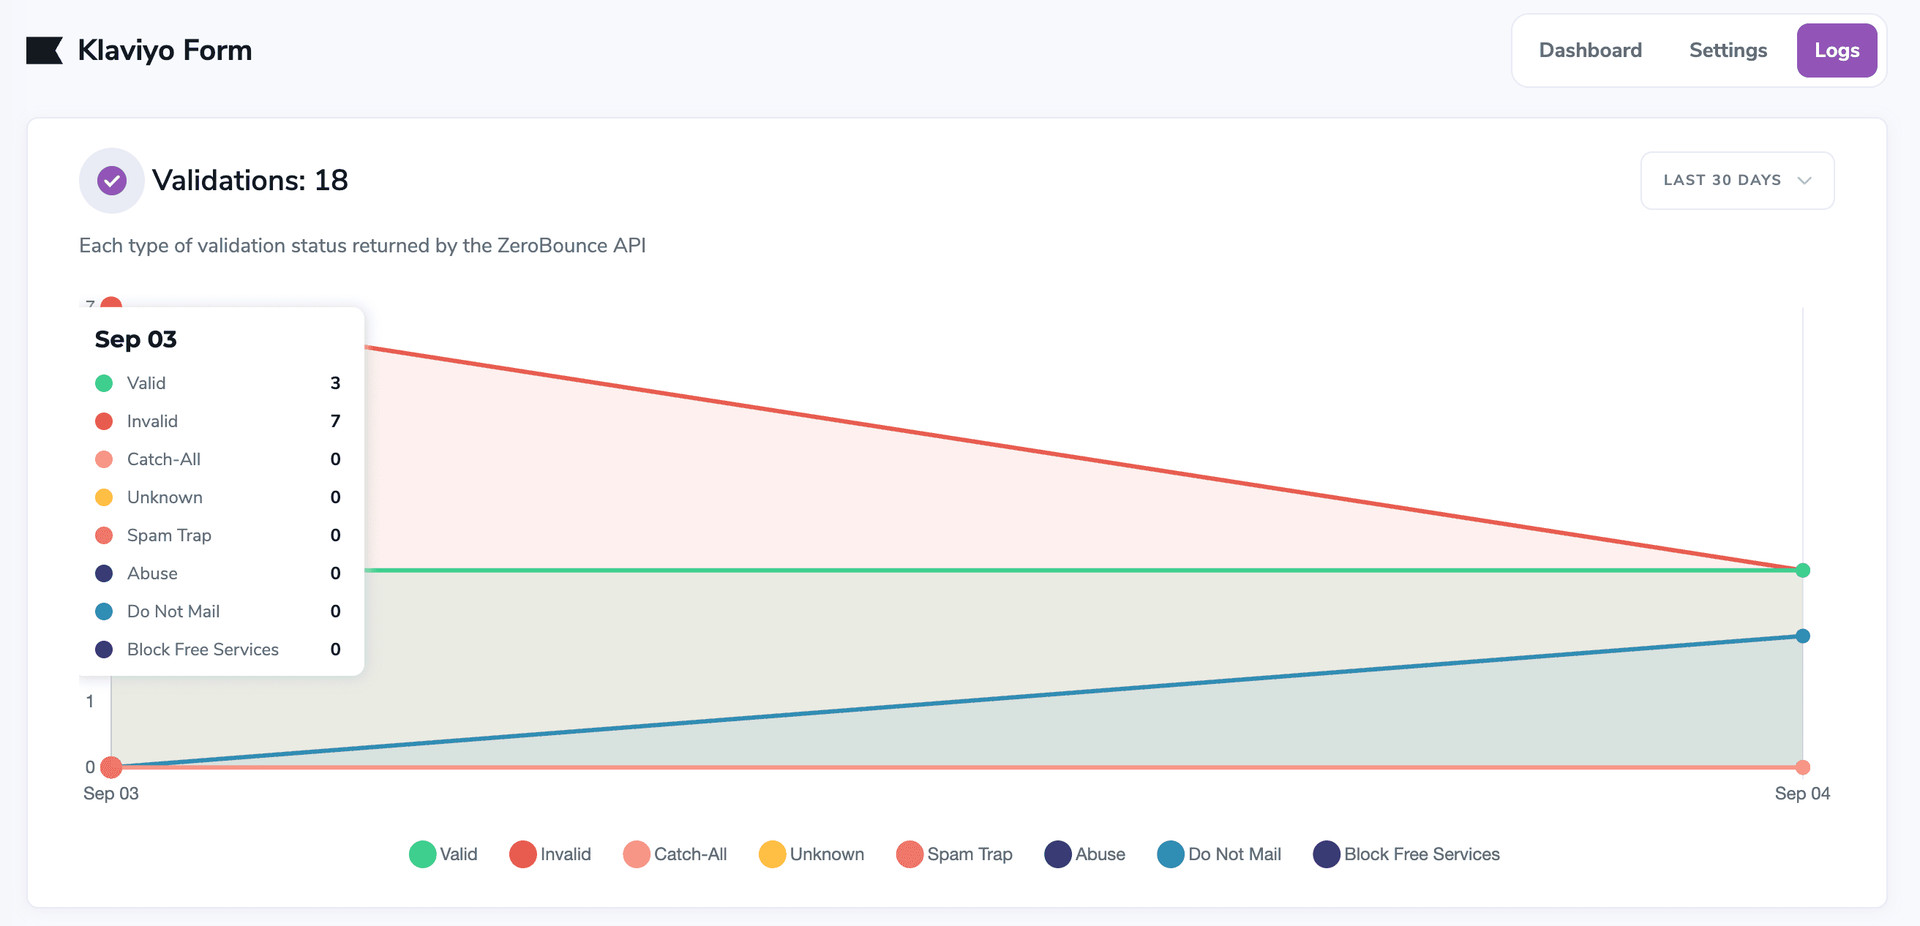
The Logs chart with validation statuses over the current month.
Below the chart, Recent validations lists the latest 50 results, 10 per page. Click Export all to download the log.
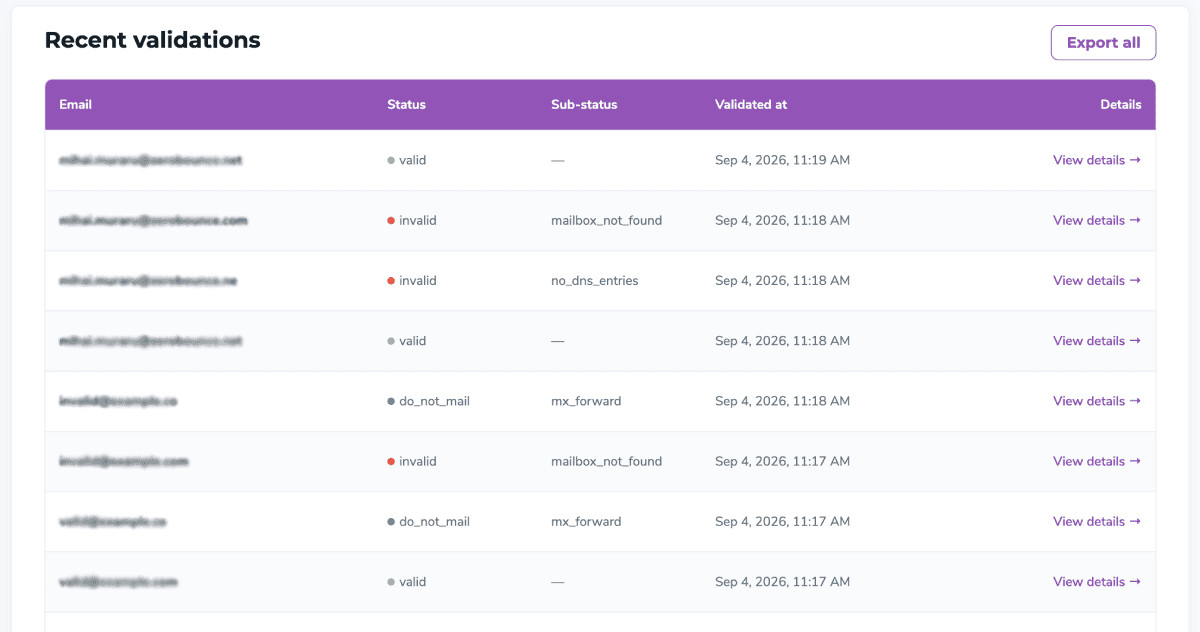
The Recent validations table.
Click View details on a row to open the record for that email.
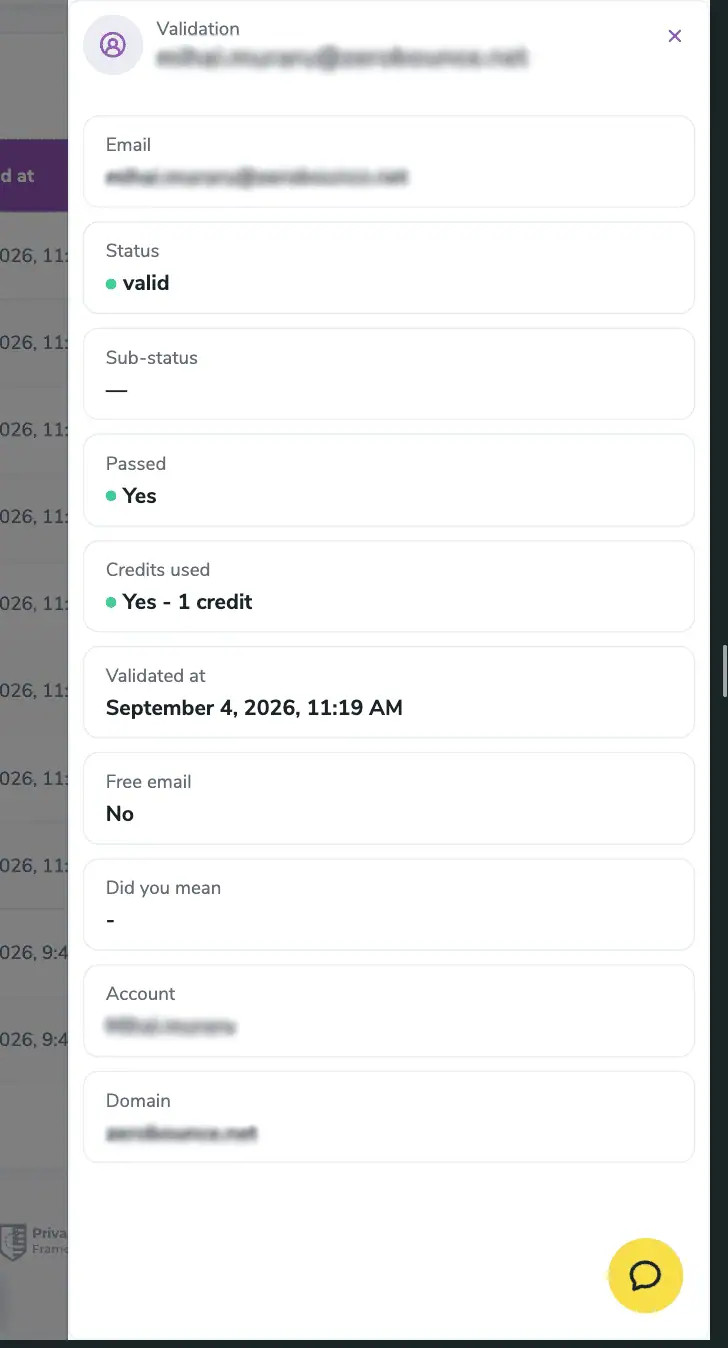
The validation details panel.
